
Find the Best Internal Wall Insulation for a Warmer Home
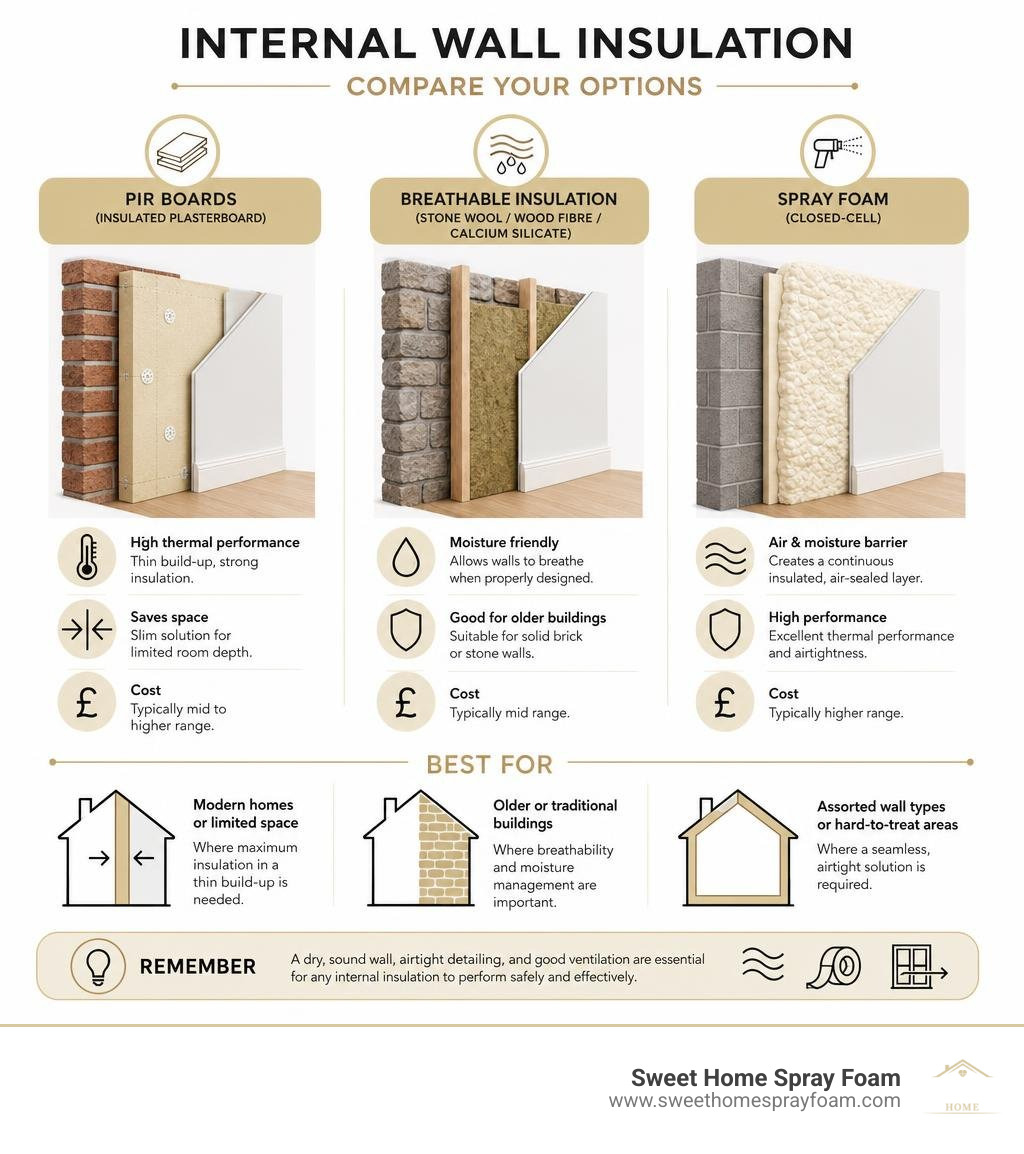
The best internal wall insulation depends on your wall type, available room space, and moisture risk. For thin, high-performance upgrades, PIR or phenolic insulated plasterboard offers strong thermal results. For older solid brick or stone walls, breathable materials such as stone wool, wood fibre, or calcium silicate can be a safer choice when designed with proper moisture control. Closed-cell spray foam can also provide a continuous insulated, air-sealed layer on suitable walls.
Uninsulated walls can account for around 33% of heat loss in a home. Insulating them from the inside can make cold rooms feel more comfortable, reduce drafts, and help lower heating demand without changing the outside of your property.
The trade-off is important: internal insulation takes up some floor space and makes the original wall colder. That can create hidden condensation if damp, air leaks, ventilation, and vapour control are ignored. A good system starts with a dry, sound wall and a plan for fresh air, sealed joints, and details around windows, sockets, radiators, and shelving.
This guide compares the leading internal wall insulation materials and installation methods, so you can balance warmth, budget, wall safety, and usable space.
Internal vs External Wall Insulation: Advantages, Trade-Offs, and Moisture Science
When retrofitting cold exterior walls, property owners face a fundamental choice: insulate from the exterior or the interior. External wall insulation wraps the building in a continuous thermal blanket, preserving internal room dimensions and keeping masonry warm. However, it alters the exterior appearance, requires costly scaffolding, and frequently clashes with planning restrictions on period properties or stone facades.
Internal wall insulation (IWI) allows room-by-room retrofitting without external scaffolding or street-facing alterations. It protects historic architecture while keeping installation flexible. Yet insulating from within fundamentally changes the building physics of your masonry.
When you place thermal barriers inside a room, you prevent indoor heat from warming the structural masonry. As a result, the existing brick or stone wall remains significantly colder throughout the winter months. This temperature drop shifts the dew point—the precise temperature at which airborne water vapour condenses into liquid water—inward toward the interface between the new insulation and the cold masonry.
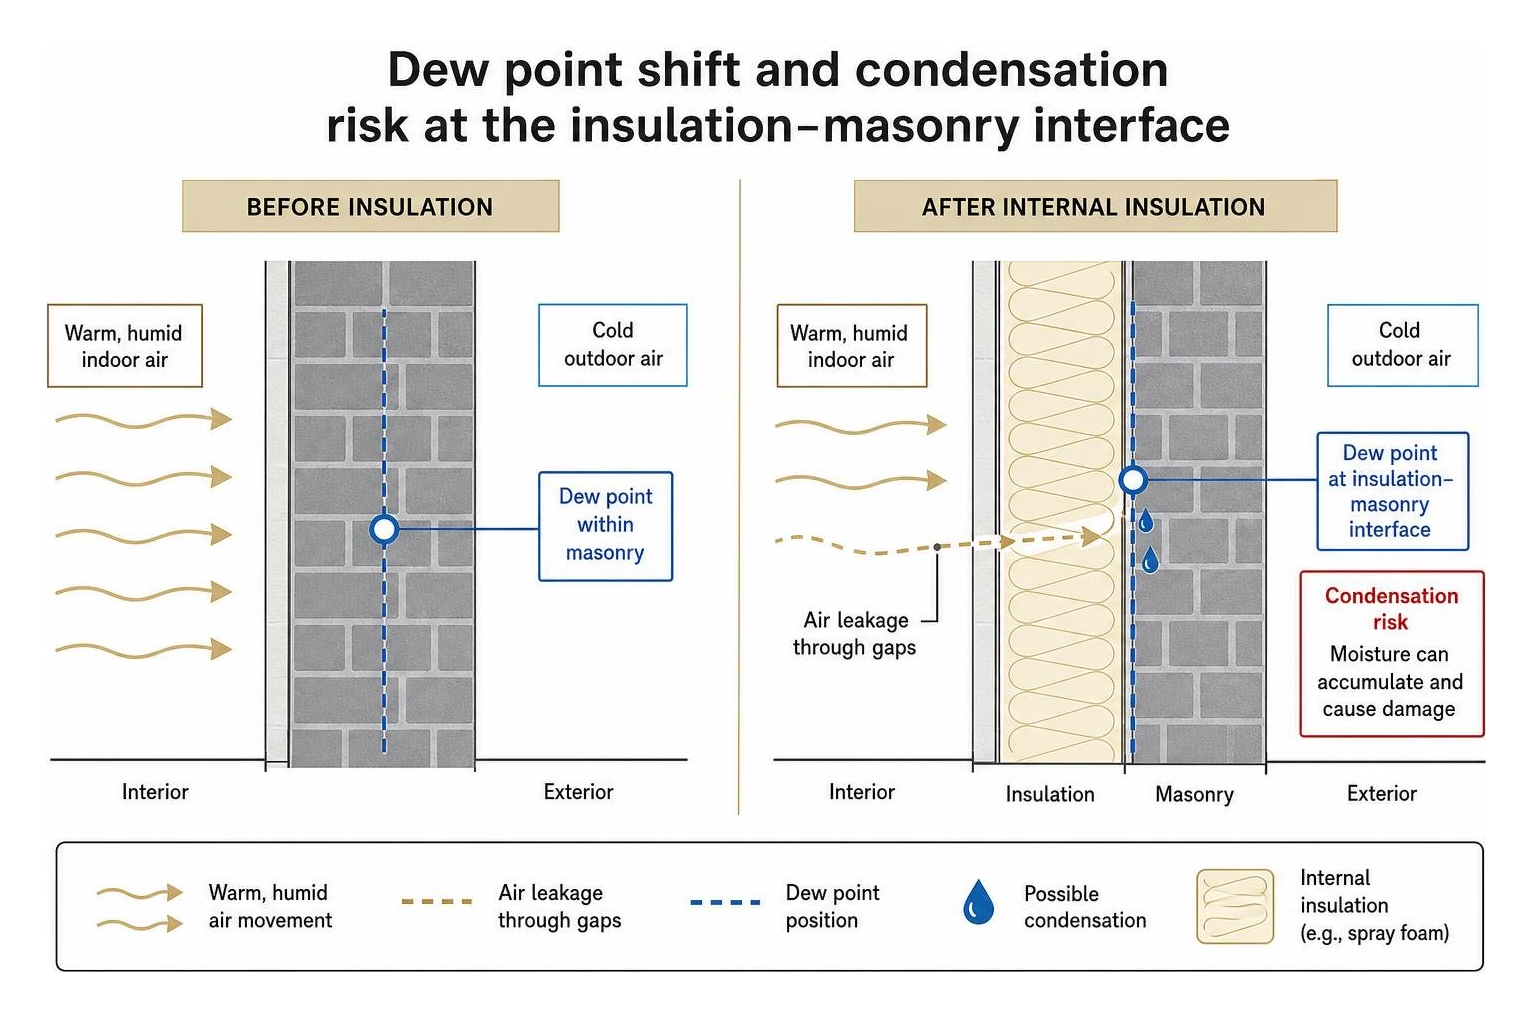
If warm, humid indoor air bypasses the insulation layer through unsealed gaps, it contacts this cold masonry interface, resulting in interstitial condensation. Over time, trapped moisture degrades timber lintels, corrodes fixings, and cultivates hidden toxic mould colonies. Comprehensive guidelines like the Retrofit Internal Wall Insulation guidance stress that every internal retrofit must manage moisture transfer alongside thermal resistance.
Controlling Condensation and Room Air Quality
Moisture management relies on two primary strategies: vapor-impermeable assemblies with continuous air barriers, or vapor-permeable (breathable) capillary-active systems that allow moisture to disperse naturally.
Regardless of the system you select, controlling internal relative humidity is non-negotiable. Modern air-sealing reduces natural air infiltration, meaning moisture generated by cooking, bathing, and breathing accumulates rapidly indoors.
To maintain healthy indoor air quality and protect building fabric:
- Continuous background ventilation must provide a minimum of 20 m³/h of outdoor air per occupant.
- Dedicated room ventilation openings should maintain a minimum diameter of 150 mm, positioned across from window openings to establish cross-ventilation.
- Trickle vents, decentralised continuous mechanical extract ventilation (dMEV), or mechanical ventilation with heat recovery (MVHR) should be integrated to keep indoor relative humidity between 40% and 60%.
Deepening your knowledge of building science through expert insulation education helps ensure that every air-sealing upgrade pairs safely with balanced ventilation.
Comparing Materials to Find the Best Internal Wall Insulation
Selecting the right insulation requires evaluating thermal conductivity ($\lambda$-value), moisture permeability, assembly thickness, and fire performance. Lower thermal conductivity values represent better insulating ability, allowing you to achieve building code standards with less thickness.
| Material Type | Thermal Conductivity ($\lambda$) | Vapor Permeability | Fire Classification | Primary Advantage |
|---|---|---|---|---|
| Phenolic Foam | 0.019 W/mK | Low (Vapour Barrier Required) | Class 0 / Euroclass B-s1, d0 | Thinnest possible profile for tight spaces |
| PIR (Polyisocyanurate) | 0.022 W/mK | Low (Foil-Faced Barrier) | Euroclass B-s2, d0 | High thermal resistance per inch |
| Stone Wool | 0.034 W/mK | High (Vapour-Open) | A1 Non-Combustible | Unmatched fire safety and acoustic dampening |
| Wood Fibre Board | 0.038 W/mK | High (Hygroscopic Buffer) | Euroclass E | Natural carbon storage and moisture buffering |
| EPS Polystyrene | 0.038 W/mK | Medium-Low | Euroclass E | Budget-friendly standard insulation |
| Closed-Cell Spray Foam | 0.022–0.028 W/mK | Impermeable (Class II Vapour Retarder) | Class 1 / Euroclass E | Seamless continuous air barrier and structural bond |
Rigid Foam Boards and PIR: The Best Internal Wall Insulation for Tight Spaces
When usable floor area is at a premium, high-performance rigid foam composite boards lead the market. Polyisocyanurate (PIR) cores offer an impressive thermal conductivity of 0.022 W/mK, while advanced phenolic cores deliver 0.019 W/mK. By comparison, expanded polystyrene (EPS) cores deliver 0.038 W/mK, requiring nearly double the thickness to match the same thermal target.
Composite insulated plasterboards combine rigid foam insulation with a plasterboard facing and integral foil vapour barrier in a single panel. To reach a modern U-value target of 0.28 W/m²K on a standard 225 mm solid brick wall, a 62.5 mm Kingspan Kooltherm K118 phenolic board gets the job done without intruding too far into living space. For budget-sensitive spaces, slim PIR products such as Unilin 15 mm boards offer an entry point at approximately £10 per square metre, providing a basic thermal break where standard assemblies would block doorways.
When balancing synthetic boards against other options, understanding the differences between traditional batts vs spray foam insulation clarifies where rigid products excel and where seamless barriers provide superior air control.
Breathable Mineral and Wood Fibre: The Best Internal Wall Insulation for Solid Walls
Historic masonry constructed with lime mortar relies on moisture evaporation to remain dry. Trapping moisture behind impermeable foam boards can saturate old brickwork. For these traditional walls, breathable (vapor-open) insulation materials provide a reliable and proven approach.
Stone wool features a thermal conductivity of 0.034 W/mK and carries an A1 non-combustible fire rating. Systems such as InteriA stone wool systems combine mineral wool batts with intelligent humidity-variable membranes. These systems allow water vapour to escape during summer months while blocking warm room air during winter, offering acoustic dampening and a 60-year design life.
Wood fibre insulation boards present another high-performance, natural solution. Products detailed in the STEICOinternal wood fibre specifications feature a thermal conductivity of 0.038 W/mK. A 60 mm wood fibre layer applied to a bare solid wall can reduce heat loss by up to 76% (improving U-values from ~2.00 W/m²K down to ~0.48 W/m²K). Furthermore, each cubic metre of wood fibre stores roughly 270 kg of CO₂, making it an environmentally responsible choice for heritage retrofits.
Ultra-Thin and Capillary-Active Systems
In rooms where window reveals, staircases, and decorative cornices make standard framing impossible, ultra-thin and capillary-active materials offer practical alternatives.
Capillary-active systems, such as Redstone Clima Redboard Pro, utilise engineered calcium silicate boards. These materials draw condensed moisture away from the wall through capillary suction and release it harmlessly into the room air as relative humidity drops. This natural cycle prevents surface mould without requiring artificial vapour barriers.
For minimal spatial impact, thin ISO-THERM thermal systems provide an ultra-thin 4 mm polyester-based composite. Applied with a potassium silicate mineral adhesive, these systems create a water-repellent, vapour-permeable layer with a finished depth of only 10 mm after skimming. They establish a thermal break on cold wall surfaces to resolve recurring surface condensation while preserving room trim.
Continuous Air Sealing with Spray Foam
Irregular stone masonry, uneven brickwork, and studded framing often leave hidden air gaps behind rigid board assemblies. These cavities create convective air loops that undermine thermal performance.
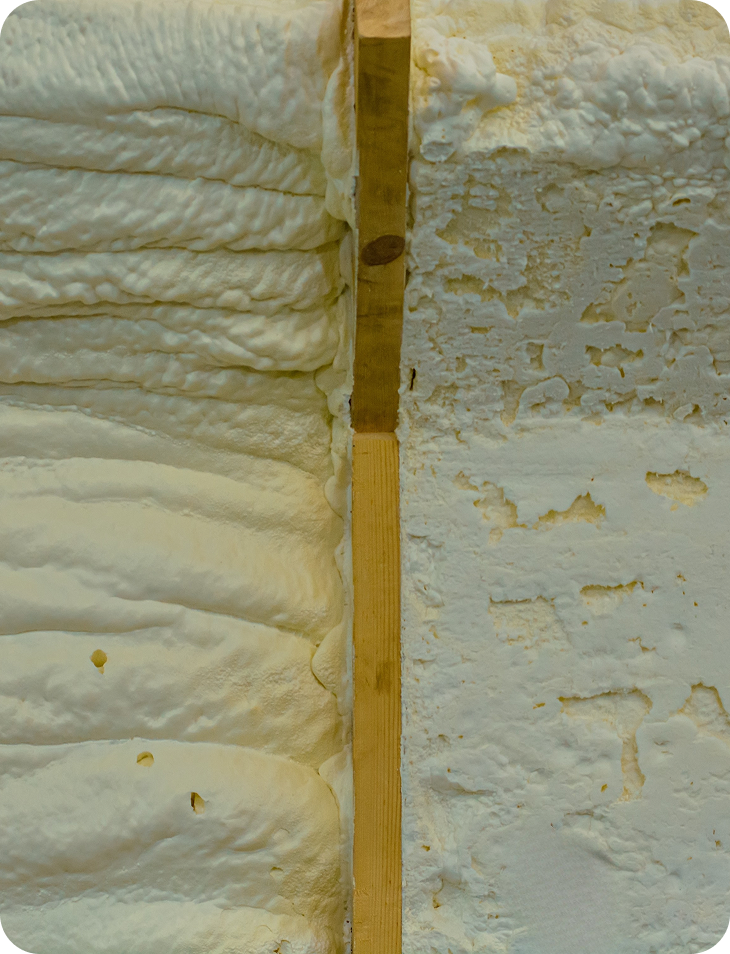
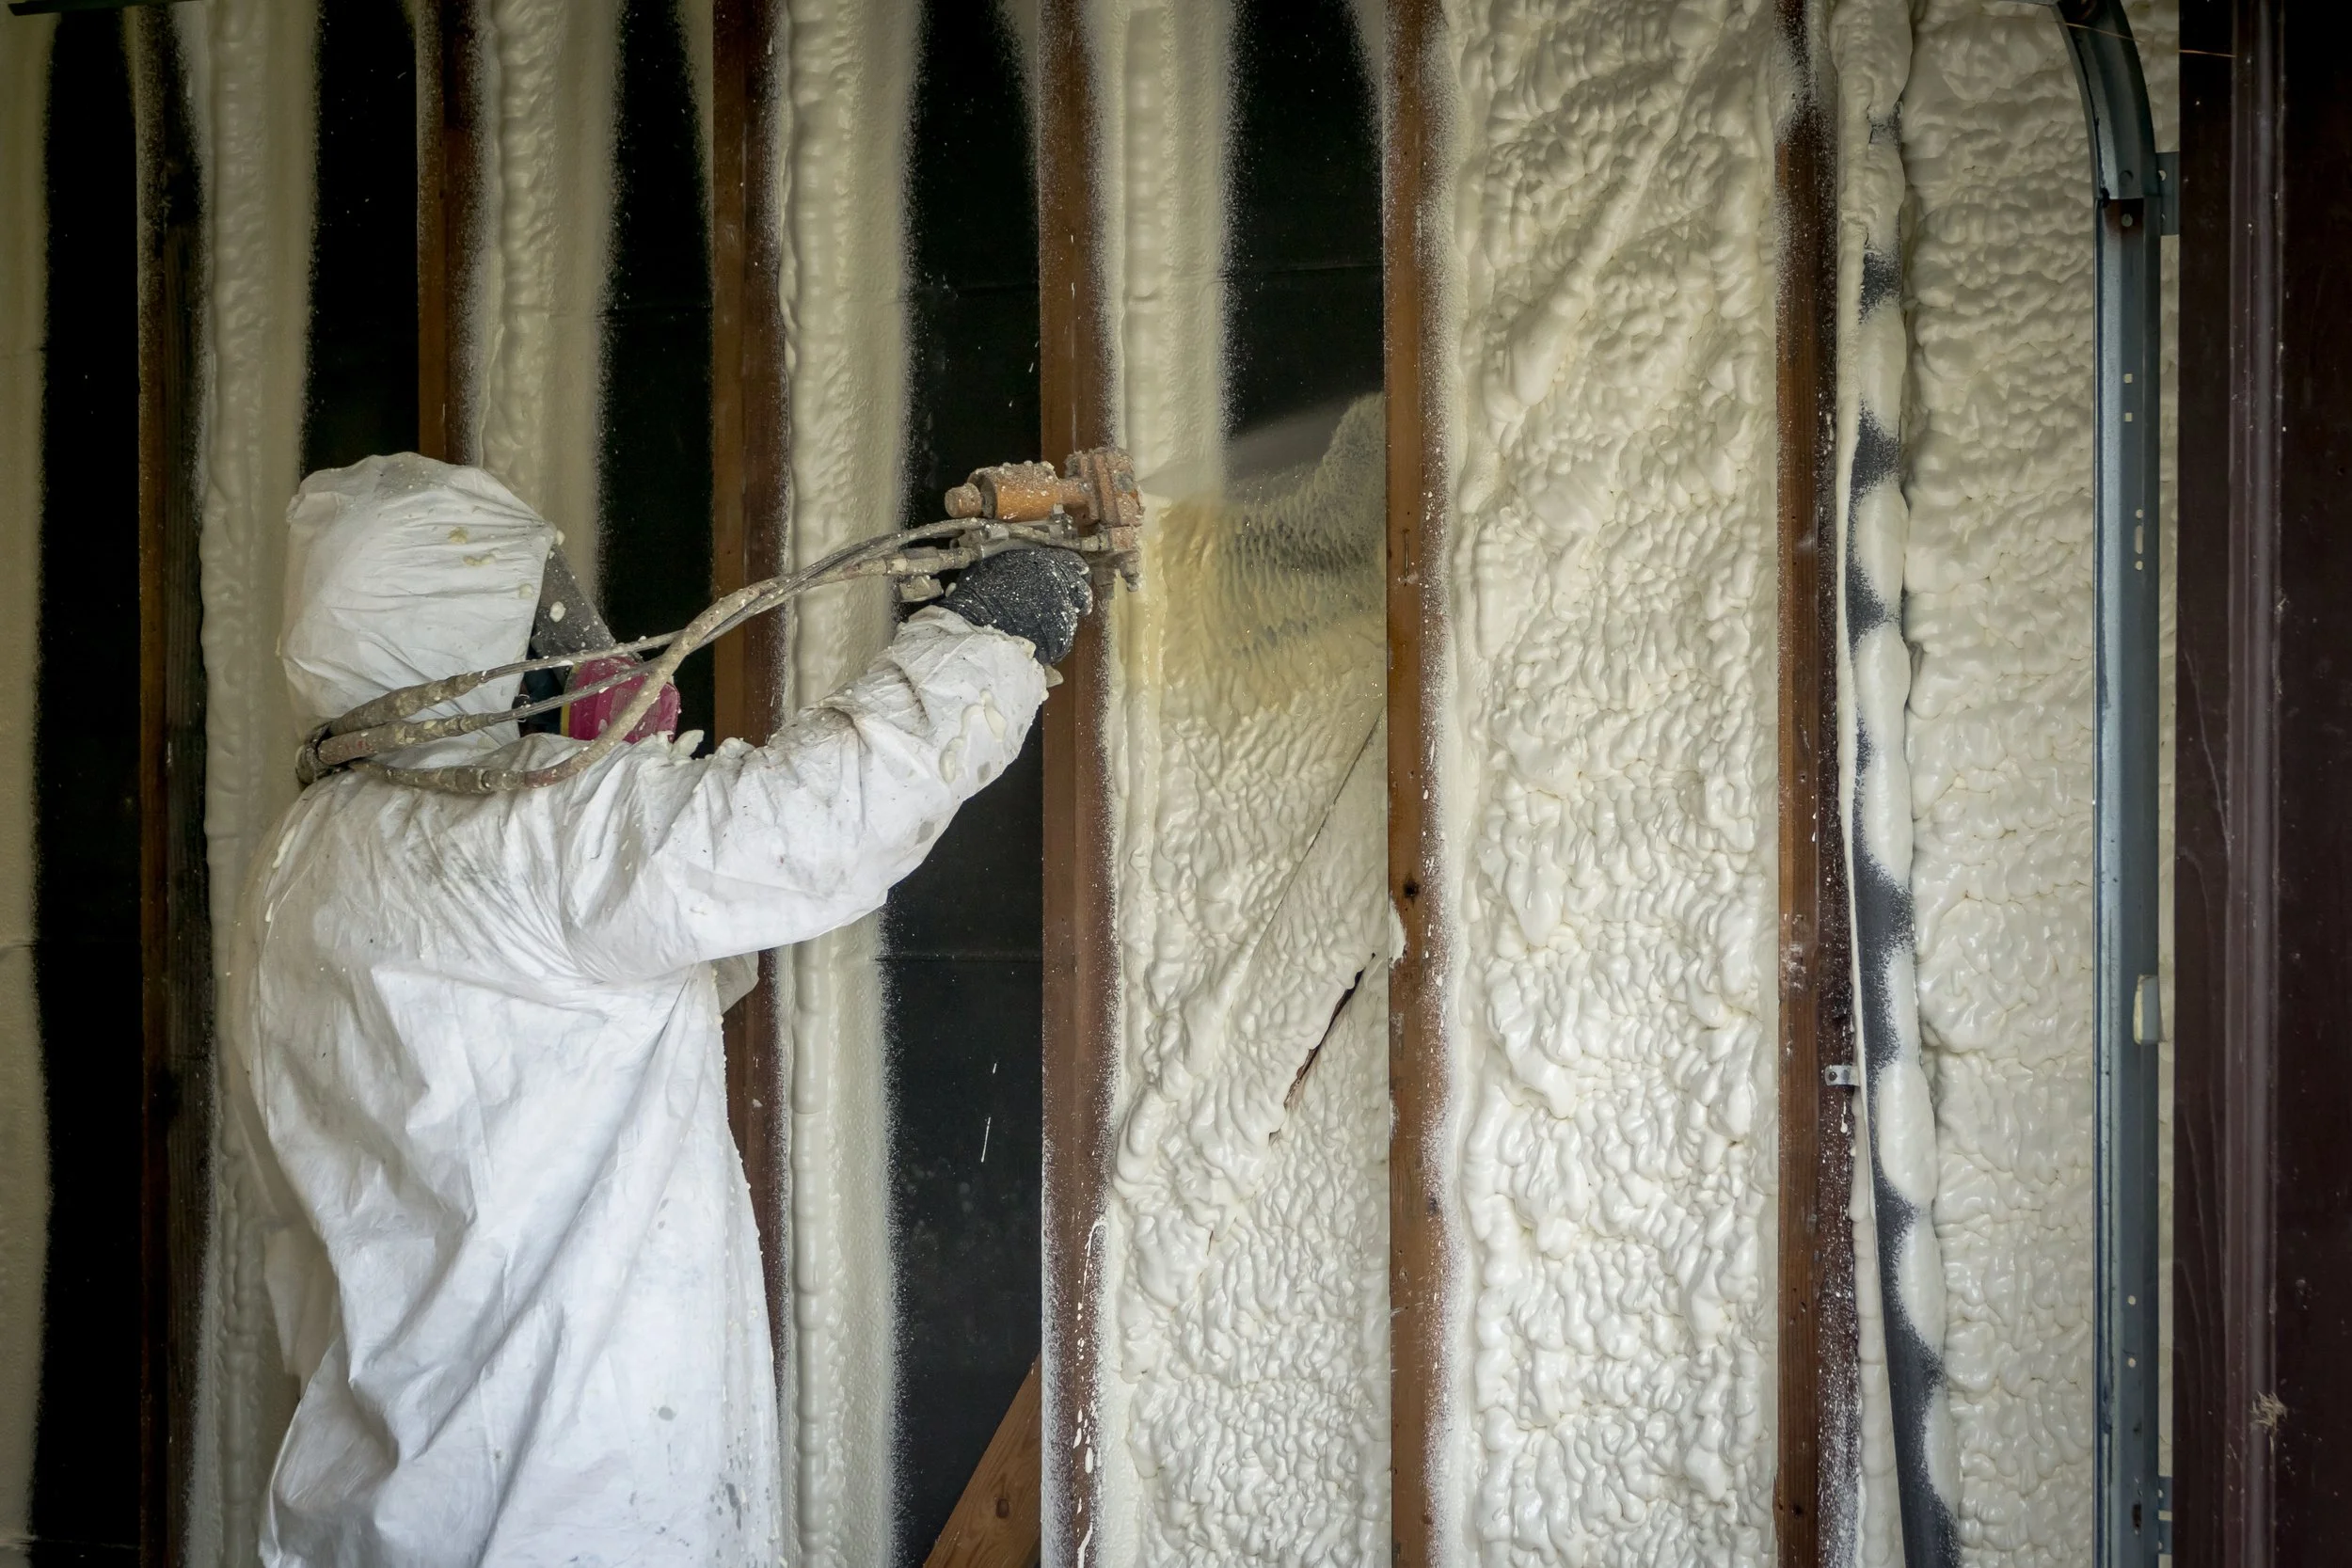
Applying high-performance wall spray foam insulation directly onto the interior substrate resolves this challenge. Closed-cell polyurethane foam expands to fill every crack, void, and mortar pocket, creating a continuous air barrier and vapour retarder in one application. It bonds directly to the substrate, eliminating air pockets behind the insulation where condensation could otherwise form.
Four Practical Methods for Insulating Cold Interior Walls
Executing a successful internal insulation retrofit requires matching the installation technique to your wall condition, budget, and structural constraints.
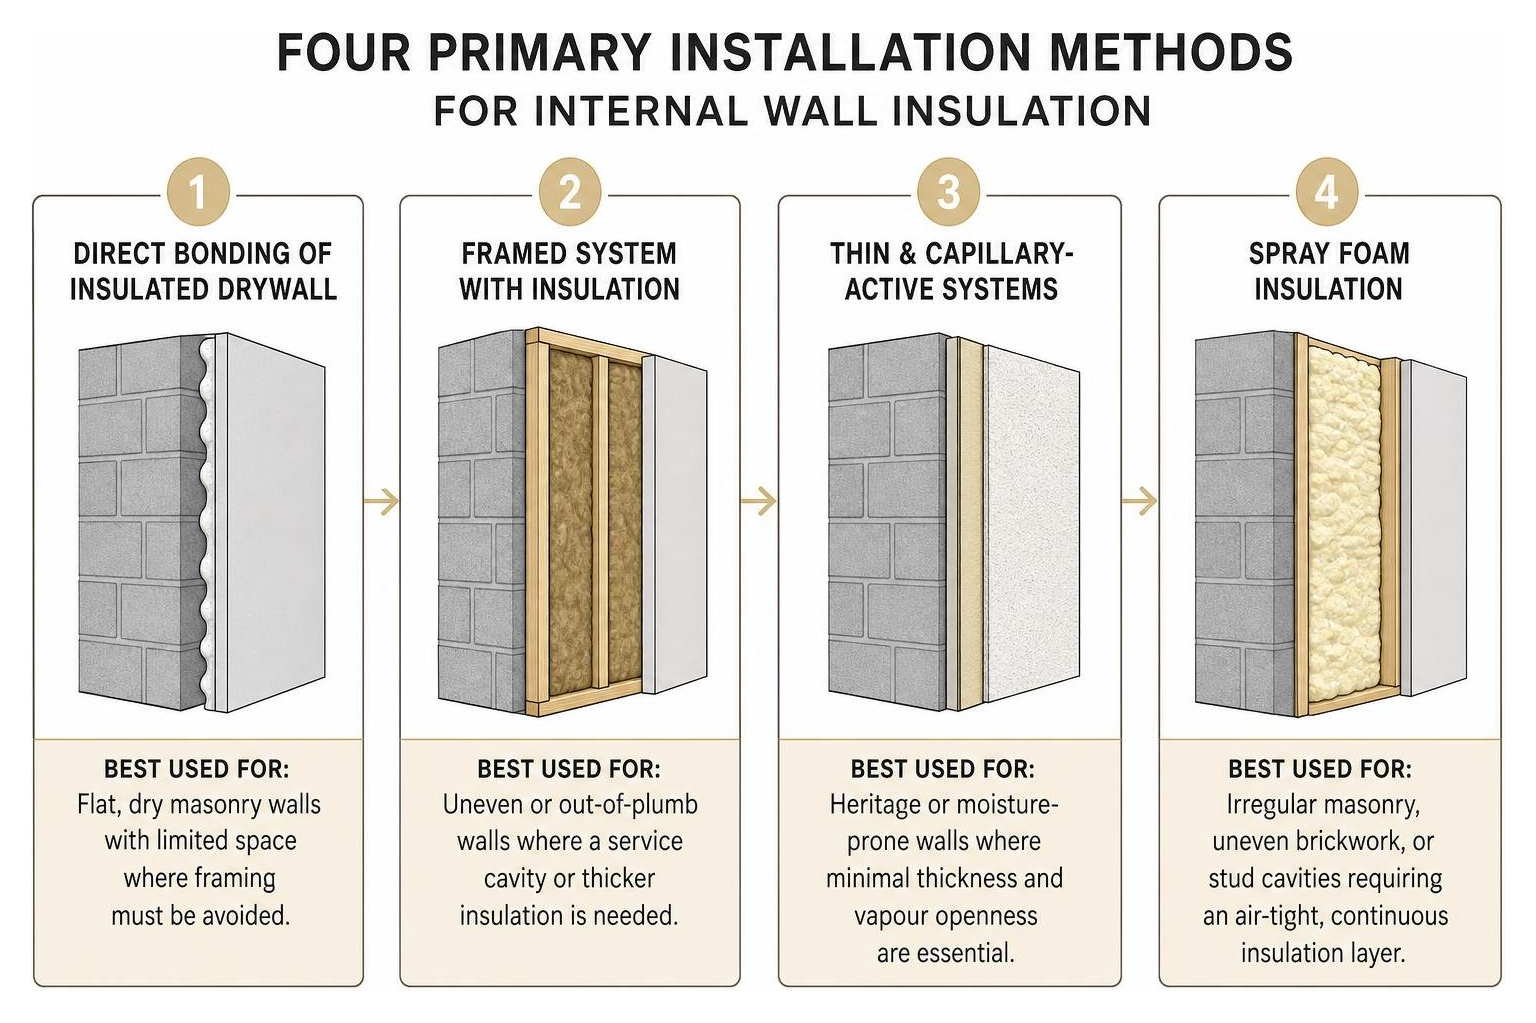
1. Direct Bonding of Insulated Drywall
Direct bonding (often referred to as "dot and dab" or continuous adhesive bedding) attaches composite insulated plasterboard directly to bare masonry using gypsum adhesive or mineral bonding mortars.
- Best Used For: Flat, dry masonry walls where space is limited and framing must be avoided.
- Process: Strip existing non-breathable wallpaper or gloss paint. Apply adhesive mortar to achieve full perimeter sealing, preventing air circulation behind the board. Press the composite boards firmly into place, secure them with secondary mechanical fire-rated fixings, and tape the joints.
- Key Risk: If masonry surfaces are out of plumb or suffer from moisture intrusion, adhesive bonds can fail and cold bridging will occur.
2. Timber Stud Framing with Infill Insulation
This traditional method involves building a timber stud frame set slightly off the original masonry, filling the cavities with insulation batts or spray foam.
- Best Used For: Uneven walls, rooms requiring heavy wall-hung storage, or projects needing straightforward routing for electrical cabling and plumbing.
- Process: Construct a preservative-treated timber stud framework stood off the masonry by 20–50 mm to form a ventilated capillary break. Fit semi-rigid stone wool, wood fibre, or sheep wool batts snugly between the studs. Install a continuous, air-tight vapour control layer (VCL) over the warm side of the timber, seal all laps with specialised tape, and finish with standard plasterboard.
3. Independent Metal Stud Systems
Lightweight steel stud framing systems isolate the new interior wall assembly from damp or uneven exterior masonry.
- Best Used For: Fast commercial or modern residential retrofits requiring high acoustic isolation, straight lines, and certified fire performance.
- Process: Install steel tracks along the ceiling and floor lined with acoustic isolating foam tape. Erect vertical steel C-studs detached from the exterior wall. Infill the frame with non-combustible stone wool or inject closed-cell spray foam. Seal the warm side with an intelligent vapour membrane and intumescent mastic before hanging fire-rated drywall.
4. Direct Adhesive Application of Vapour-Open Boards
This breathable method adheres natural wood fibre or calcium silicate panels directly to lime-plastered masonry using vapor-permeable mineral adhesives.
- Best Used For: Solid brick, flint, or stone heritage buildings that must remain fully vapor-permeable.
- Process: Remove gypsum plasters back to original masonry or sound lime coats. Apply a breathable lime levelling coat if the wall is uneven. Trowel a continuous layer of potassium silicate or hydraulic lime adhesive onto the back of the breathable board, press it flush against the wall to eliminate air voids, insert helical mechanical anchors, and finish with breathable lime plaster and silicate paint.
Project Costs, Energy Savings, and Practical Considerations
Upgrading solid wall insulation requires balancing upfront capital investments against ongoing energy savings and practical living considerations. Across the UK, standard solid wall insulation installations typically range between £12,000 and £15,000 for a full house retrofit, with internal wall systems averaging around £12,000 for a typical semi-detached home.
Retrofitting internally can lower room heat loss by up to 30% to 33%, translating to substantial reductions on monthly heating bills. However, successful installations demand careful planning around everyday details:
- Floor Area Reduction: A typical 65 mm to 100 mm framed wall assembly reduces room dimensions along insulated walls. Across a small room, this can trim 1 to 2 square metres of usable floor space. Thin-profile systems (10 mm to 20 mm) help mitigate space loss in narrow corridors and entryways.
- Services and Fixtures: Radiators, electrical outlets, light switches, and skirting boards must be extended or relocated forward into the room.
- Heavy Wall Loads: Kitchen cabinets, heavy mirrors, and large televisions cannot hang directly from standard plasterboard. Install timber noggins within stud frames or use long anchor bolts secured into the structural masonry behind the insulation.
- Thermal Bridging at Reveals: Do not skip window and door reveals. Applying narrow, high-efficiency insulation (e.g., 20 mm phenolic or aerogel boards) around frame reveals prevents cold borders that attract mould.
When undertaking substantial retrofits, consider tackling building envelope weak points together. Learn how protecting attic and crawl space boundaries works alongside wall insulation to stop chimney-effect drafts throughout your home.
When you are ready to move forward, selecting qualified professionals is critical. Poorly executed wall retrofits account for significant remediation claims under public grant schemes. Review our guide on finding certified insulation contractors to ensure your installer carries proper credentials and guarantees.
Frequently Asked Questions About Internal Wall Insulation
How much floor space is lost when installing internal wall insulation?
The amount of floor space lost depends on the system you install:
- Ultra-thin systems: Take up roughly 10 mm to 15 mm of space, causing virtually unnoticeable floor area loss.
- Direct-bonded high-performance boards: Typically require 50 mm to 65 mm (including plaster finish).
- Independent stud assemblies with service cavities: Require 80 mm to 120 mm of space. In an average 4m x 4m room, installing a 100 mm system along two external walls reduces floor area by approximately 0.76 m² (around 4.7% of total floor area).
Can internal wall insulation be installed over damp walls?
No. Internal insulation must never be installed over active damp, rising damp, or penetrating rain leaks. Adding interior insulation lowers the masonry temperature, which slows evaporation. Trapped water will degrade framing, rot timbers, and foster severe mould growth behind the assembly.
Before installation:
- Identify and resolve all external defects (leaking gutters, cracked render, damaged pointing).
- Treat any rising damp and allow the wall to dry out completely.
- Conduct moisture content testing across the substrate prior to fitting insulation materials.
How are heavy fixtures and radiators remounted after internal insulation?
Plasterboard alone cannot support heavy, cantilevered loads like radiators, kitchen units, or large wall-mounted televisions. During the framing stage, solid horizontal timber noggins or plywood backing panels should be secured between the studs at the required mounting heights.
If direct-bonded boards are used without framing, install heavy-duty core fixings or sleeve anchors that pass completely through the insulation layer to anchor securely into the structural brick or stone behind it.
Conclusion
Upgrading your home with the best internal wall insulation improves comfort, stops drafts, and cuts energy bills. Choosing the right approach comes down to your home's construction:
- High-efficiency rigid PIR or phenolic composite boards deliver maximum thermal resistance in tight floor plans.
- Breathable stone wool, wood fibre, and calcium silicate protect the structural integrity of historic solid masonry.
- Closed-cell spray foam creates a seamless air-and-vapour barrier over irregular surfaces.
By pairing quality materials with sound moisture management, careful detailing, and balanced room ventilation, you can create a warmer, healthier living space.
If you are planning an energy upgrade in Virginia—including Richmond, Roanoke, Lynchburg, or Smith Mountain Lake—our team at Sweet Home Spray Foam is here to help. We provide high-performance spray foam insulation, concrete lifting, clear upfront pricing, fast service, and guidance on local rebates.
Explore our comprehensive Sweet Home Spray Foam home energy solutions today to schedule your assessment and take the next step toward a comfortable, energy-efficient property.