
Check Attic Floor Joists Before Adding Storage or Flooring
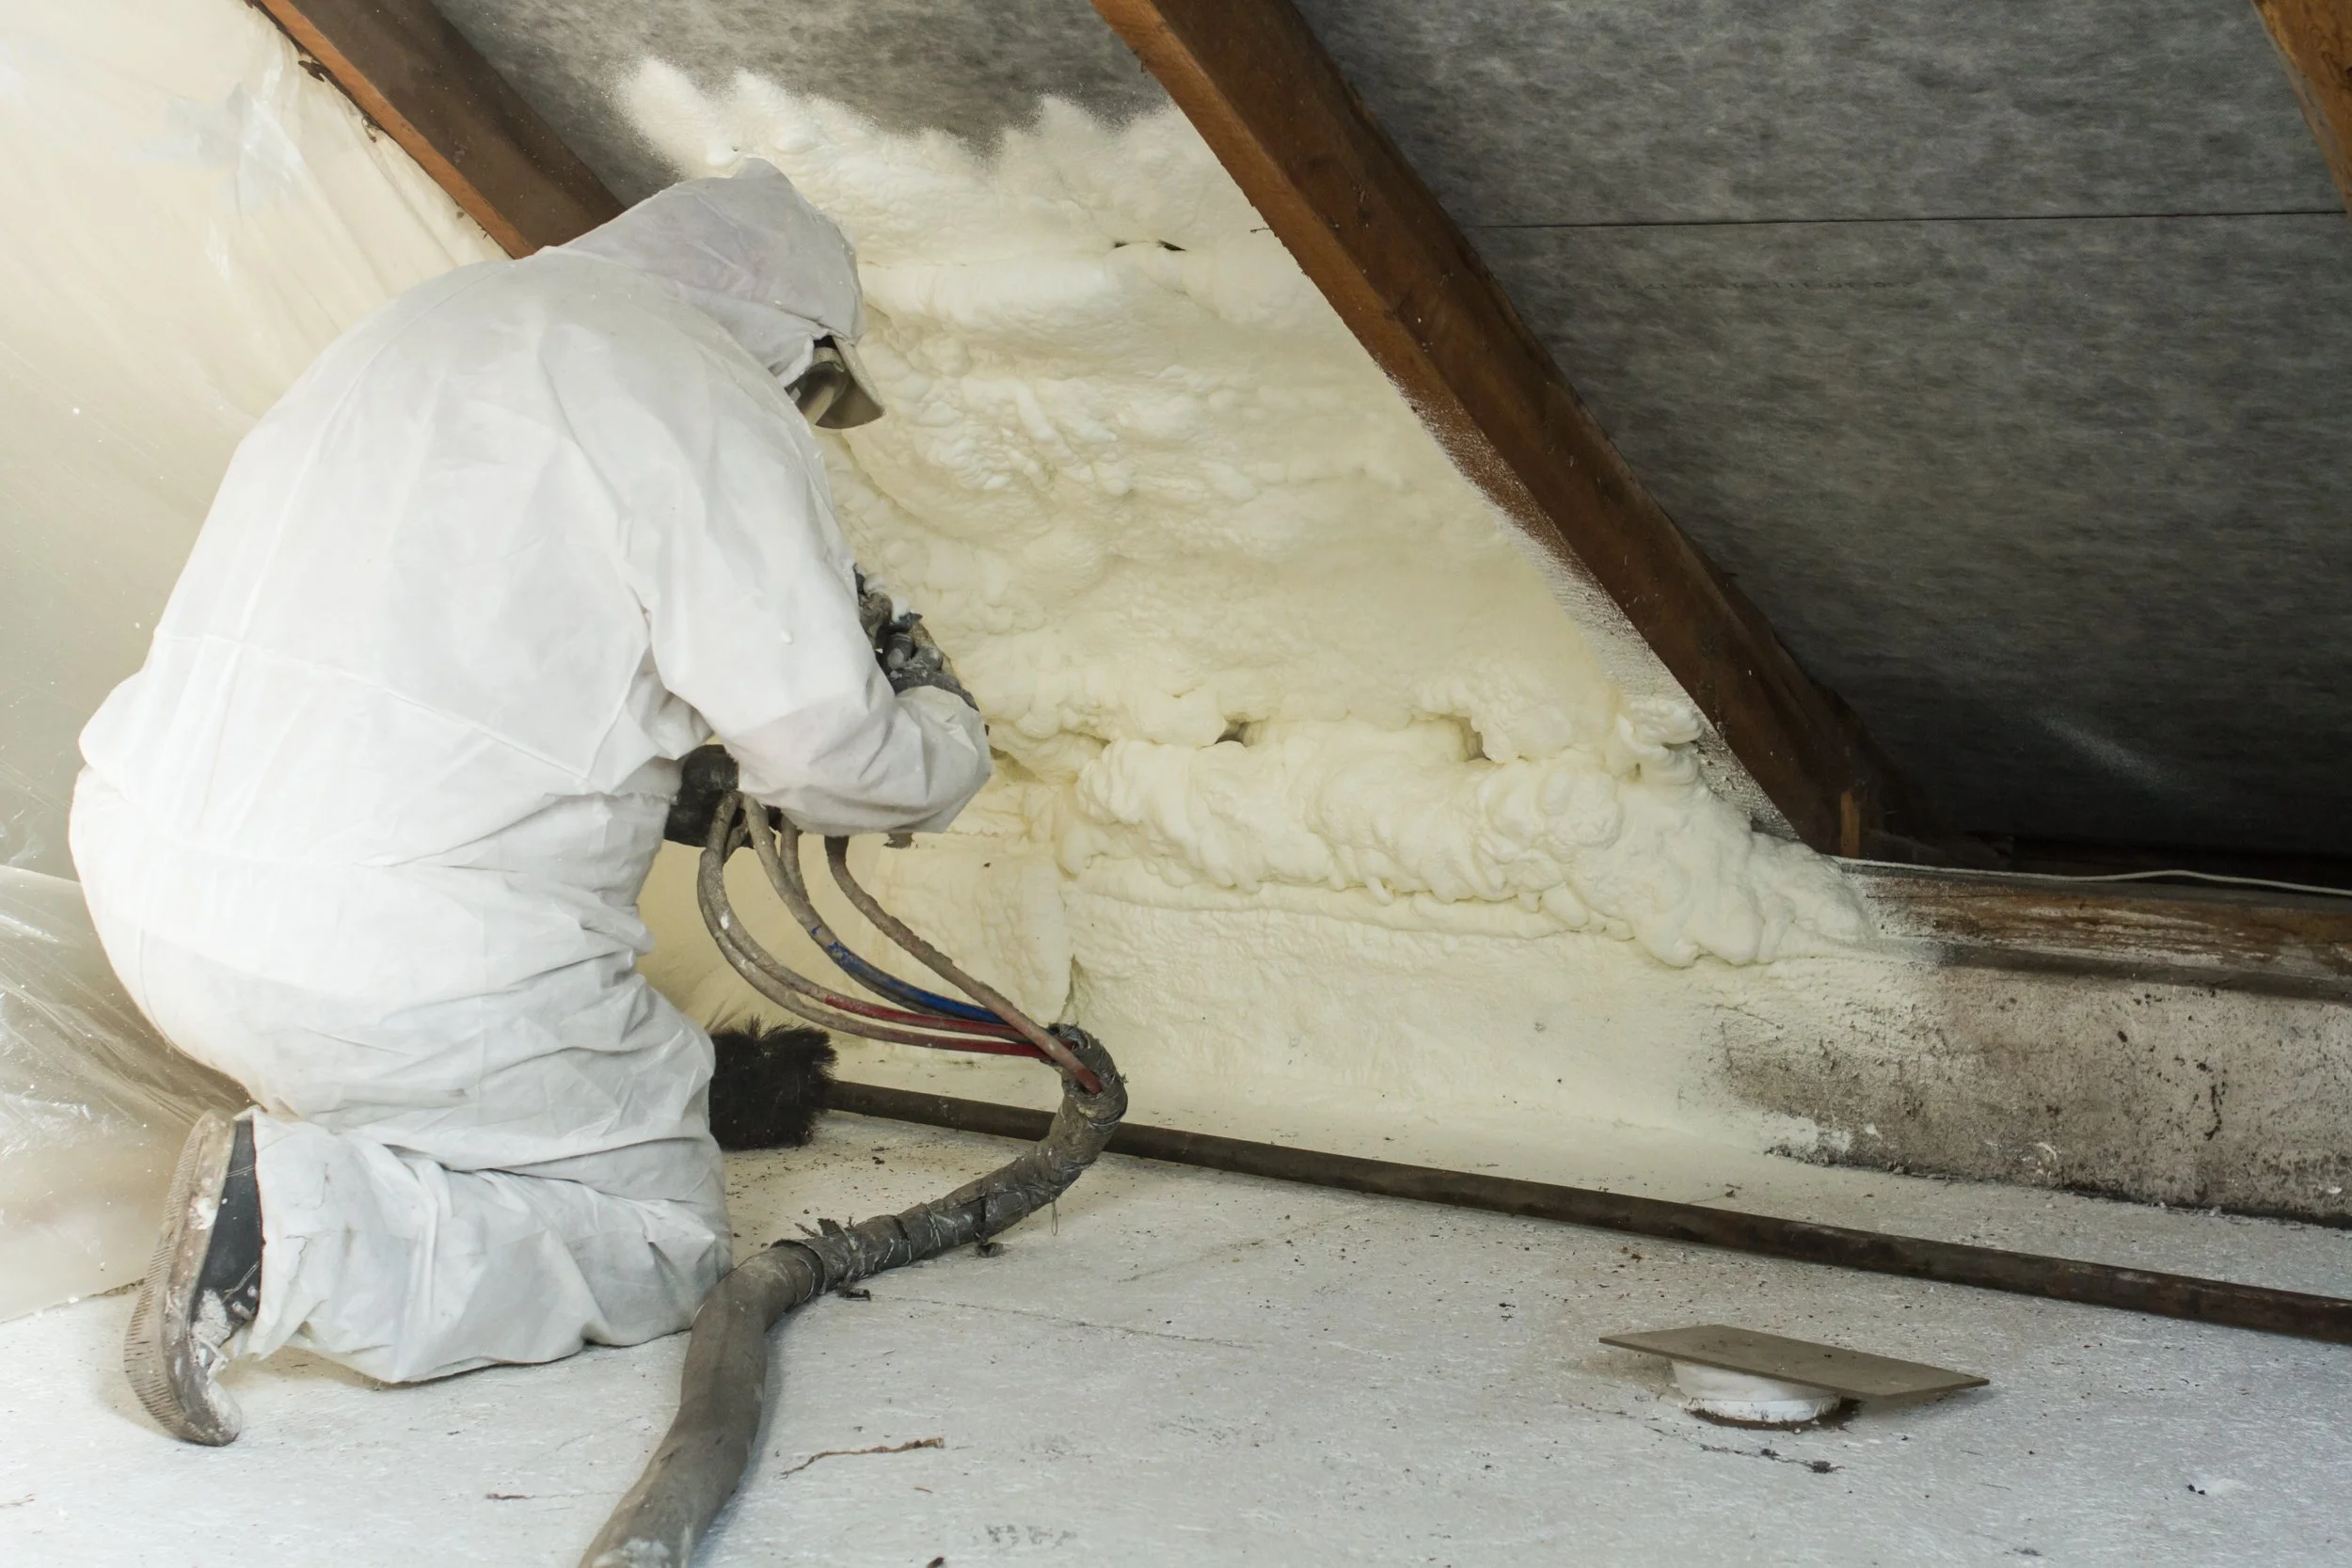
Before you add plywood, storage bins, or a finished room, check whether your attic floor joists can carry the added weight. Measure the joists' actual depth, on-center spacing, and full unsupported span. Then compare those details to the intended use:
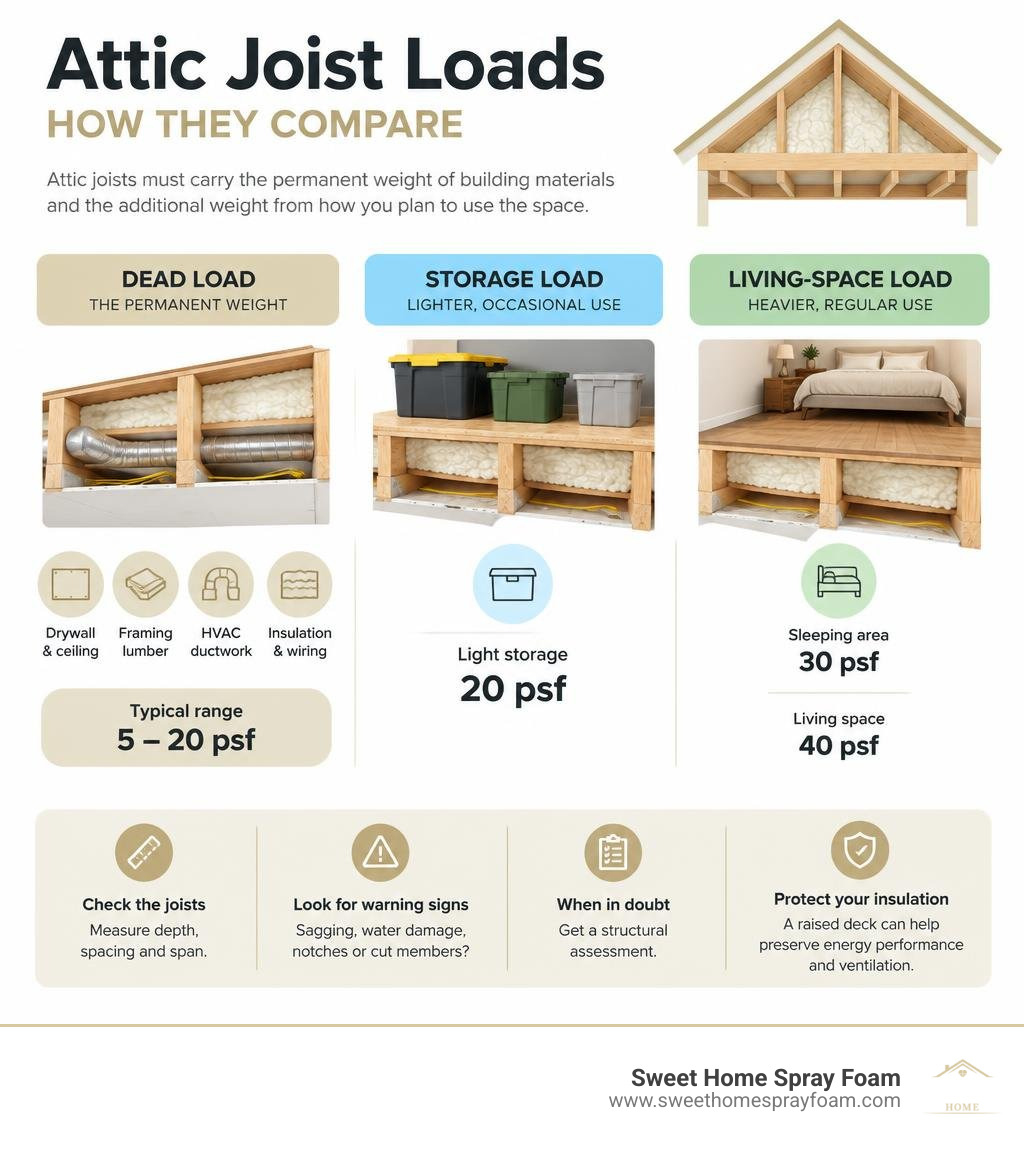
- Light storage: commonly designed around 20 pounds per square foot (psf) of live load.
- Sleeping area: often requires 30 psf live load.
- Living space: commonly requires 40 psf live load.
The joists must also carry the permanent weight of drywall, insulation, decking, and any built-in finishes. A thicker plywood floor can reduce flex between joists, but it does not make undersized joists stronger.
Many attics were framed to support a ceiling below, not a room above. If you see sagging, water damage, deep notches, cut truss members, or a plan for heavy storage or a finished space, stop and get a structural assessment before building. A raised deck can also protect spray foam or other insulation details while preserving the attic's energy performance and ventilation plan.
Understanding Dead Load vs. Live Load in Attic Framing
Every piece of framing timber above your head is subject to two distinct engineering forces: dead load and live load. Grasping the difference between these loads is essential when consulting guidelines for attic floor joist sizing to evaluate your home's structural capacity.
- Dead Load: This is the permanent, static weight of the building materials themselves. In an attic, dead load includes the ceiling drywall or plaster attached underneath, the structural framing lumber, electrical wiring, HVAC ductwork, and the insulation resting between the bays. Typical unfinished ceiling framing is designed to carry a dead load of roughly 5 to 10 psf. If you install heavy subflooring, luxury vinyl plank, or built-in cabinetry, that dead load can quickly climb to 15 or 20 psf.
- Live Load: This refers to the temporary, variable weight that enters the space. It includes holiday decoration bins, furniture, boxes of family heirlooms, and people walking across the floor.
When joists are subjected to excessive live or dead loads, they bend downward. In structural engineering, this downward movement is known as deflection. Building codes mandate an allowable deflection limit of L/360 for residential floors. This mathematical standard means that over a span of length $L$ (in inches), the framing must not bend more than $1/360\text{th}$ of that distance under a full design load. For example, over a 10-foot span (120 inches), the maximum acceptable center deflection is just 0.33 inches:
$$\text{Deflection Limit} = \frac{120\text{ in}}{360} = 0.33\text{ in}$$
Exceeding the L/360 limit causes structural drywall stress. The ceiling underneath will develop cosmetic cracks along tape joints, pop drywall screws loose, and eventually sag or detach from the joists entirely.
How to Inspect and Measure Existing Attic Floor Joists
Before drafting any storage plans, grab a tape measure, a reliable flashlight, and a respirator to inspect your framing:
- Measure Depth and Thickness: Measure the actual physical dimensions of the lumber, not the nominal trade name. Modern dimensional lumber is surfaced down: a standard 2x6 actually measures $1.5 \times 5.5\text{ inches}$, a 2x8 is $1.5 \times 7.25\text{ inches}$, and a 2x10 is $1.5 \times 9.25\text{ inches}$. In older homes built before the mid-20th century, you may encounter true rough-sawn lumber that measures a full 2 inches thick.
- Determine On-Center (OC) Spacing: Measure the distance from the center of one joist to the center of the adjacent joist. Standard residential framing is spaced at 16 inches or 24 inches on center, though older or custom properties may have 12-inch or 19.2-inch spacing.
- Calculate Clear Span Length: Measure the open, unsupported distance between load-bearing walls below. If a joist runs across the entire house but rests on an interior load-bearing partition wall midway through, measure the clear span between the outer wall and the center support partition, not the overall length of the house.
- Inspect for Structural Sag and Damage: Lay a 4-foot level or stretch a tight string line across the top and bottom chords of the framing. Check for visible crowning, bowing, insect damage (like termite channels or carpenter ant tunneling), and signs of wood rot caused by historic roof leaks. Also look out for aggressive mechanical notches or holes bored through the middle third of the span by past electricians or plumbers.
Standard Weight Capacities: Light Storage vs. Habitable Rooms
Residential framing codes differentiate between pure ceiling framing and functional floor framing:
- 10 psf Dead Load Rating (Ceiling Only): Standard 2x4 or lightweight ceiling joists are engineered solely to hold drywall and insulation. They possess zero reserve capacity for walking or storing possessions.
- 20 psf Live Load (Light Storage): Code requirement for limited attic storage served by a drop-down ladder. This accommodates lightweight plastic storage totes, luggage, and seasonal items distributed evenly across the floor.
- 30 psf Live Load (Attic Sleeping Rooms): The baseline requirement under the International Residential Code (IRC) for attic conversions intended as bedrooms with fixed stairs.
- 40 psf Live Load (Habitable Living Space): The standard floor capacity for active living rooms, home gyms, or offices where multiple occupants, heavy desks, and furniture reside.
Point load concentration represents another critical risk. A single 200-pound person standing on one foot places a concentrated point load on one spot of a single joist. Without a subfloor to distribute that weight across multiple members, undersized framing can crack along the grain.
Sizing and Span Limits for Attic Floor Joists
Allowable joist spans depend on the lumber species, grade, spacing, and target load. Denser species like Southern yellow pine and Douglas fir-larch possess higher fiber stress ratings ($F_b$) and moduli of elasticity ($E$) than softer woods like Spruce-Pine-Fir (SPF) or Hem-Fir, allowing them to span longer distances under identical loads.
The following reference table outlines the maximum allowable spans for common framing members under typical residential load scenarios:
| Nominal Lumber Size | Spacing (On-Center) | Max Span: 10 psf Dead / 20 psf Live (Storage) | Max Span: 10 psf Dead / 30 psf Live (Attic Bedroom) | Max Span: 10 psf Dead / 40 psf Live (Habitable Floor) |
|---|---|---|---|---|
| 2x4 (#2 SPF) | 16 in 24 in |
9 ft 4 in 7 ft 7 in |
Unsuitable Unsuitable |
Unsuitable Unsuitable |
| 2x6 (#2 Douglas Fir) | 16 in 24 in |
14 ft 5 in 11 ft 9 in |
12 ft 7 in 10 ft 3 in |
11 ft 5 in 9 ft 4 in |
| 2x8 (#2 Douglas Fir) | 16 in 24 in |
18 ft 10 in 15 ft 5 in |
16 ft 6 in 13 ft 6 in |
15 ft 0 in 12 ft 3 in |
| 2x10 (#2 Southern Pine) | 16 in 24 in |
23 ft 8 in 19 ft 4 in |
20 ft 9 in 16 ft 11 in |
18 ft 10 in 15 ft 5 in |
| 2x12 (#2 Southern Pine) | 16 in 24 in |
28 ft 9 in 23 ft 6 in |
25 ft 3 in 20 ft 7 in |
22 ft 10 in 18 ft 8 in |
Maximum Safe Spans by Lumber Dimension and Spacing
- 2x4 Joists: Fundamentally limited. 2x4 members are intended only to hold drywall and insulation. Spans exceeding 7 to 9 feet cannot safely support regular foot traffic or storage without bowing.
- 2x6 Joists: Capable of handling light storage over spans up to 12 to 14 feet at 16 inches on center. However, they are generally undersized for finished living spaces unless the span is short (under 11 feet).
- 2x8 Joists: The workhorse of traditional residential floor framing. They comfortably handle 30 psf attic bedroom loads over spans of 15 to 16 feet when spaced 16 inches on center.
- 2x10 & 2x12 Joists: Required for long, open spans (18 to 25+ feet) and multi-use habitable conversions. They provide high rigidity, minimizing floor bounce and preventing ceiling cracks below.
Truss Systems vs. Traditional Rafter and Joist Framing
It is crucial to recognize how your roof is built before placing any weight in the attic:
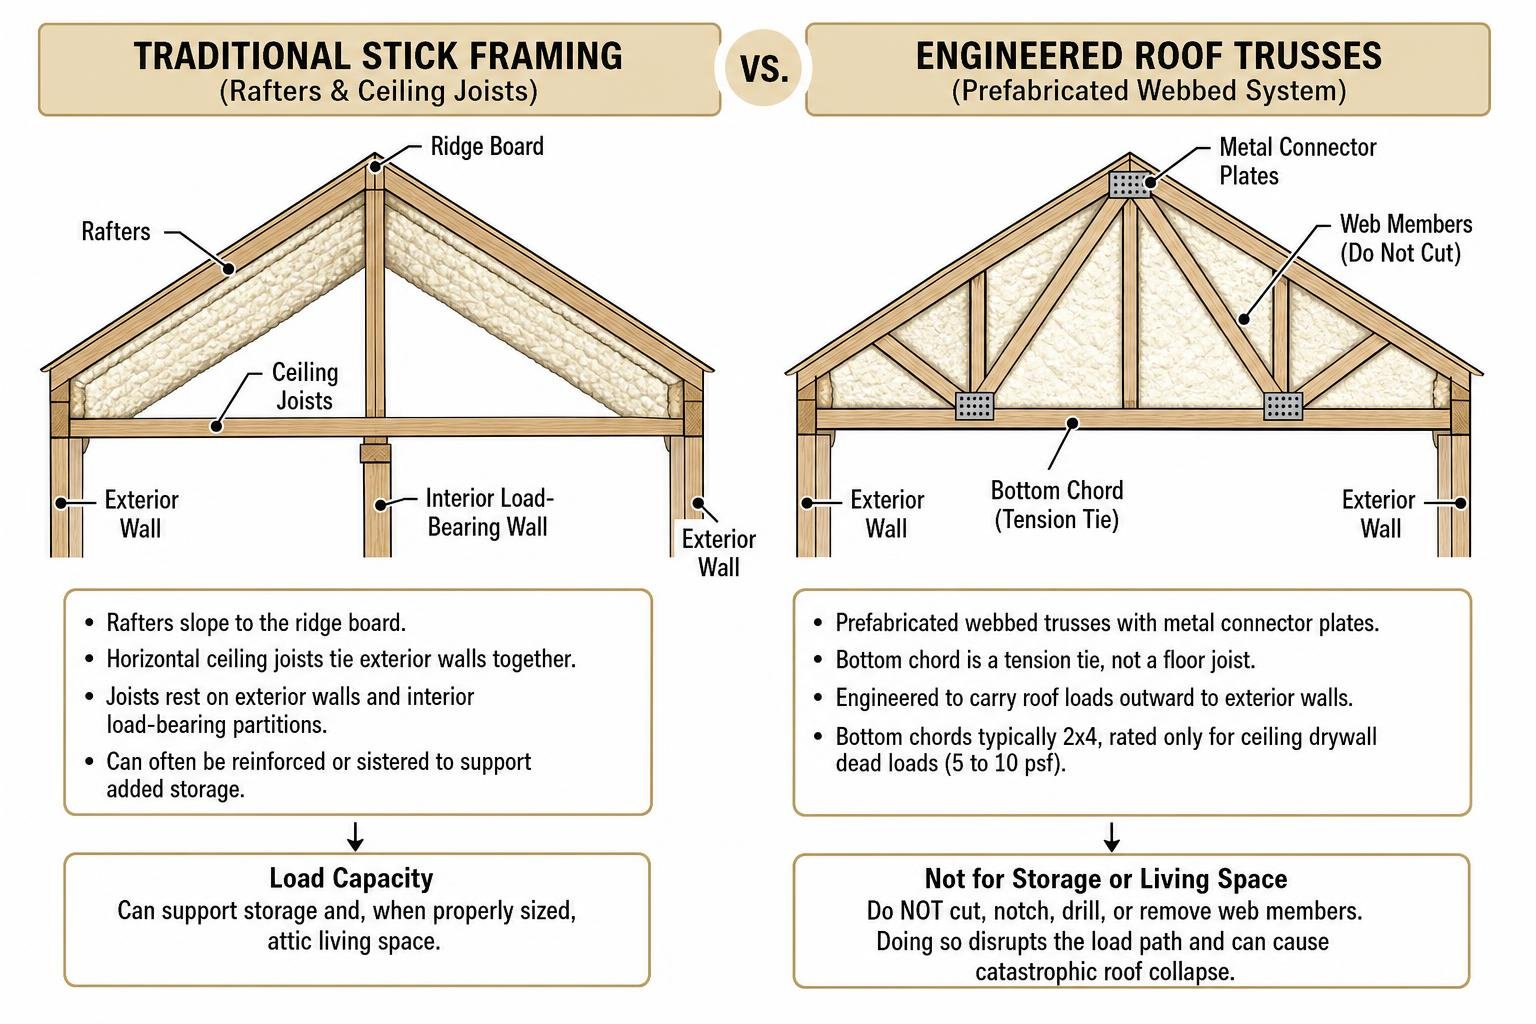
- Traditional Stick Framing (Rafters and Ceiling Joists): Built on-site using dimensional lumber. Rafters slope upward to the ridge board, while horizontal ceiling joists tie the exterior wall plates together to prevent the roof from pushing the walls outward. Because these joists rest directly on exterior walls and interior load-bearing partitions, they can often be reinforced or sistered to support added storage.
- Engineered Roof Trusses: Prefabricated webbed structural units built with metal connector plates (gang-nail plates). The bottom horizontal timber of a truss is a tension tie chord, not a floor joist. Trusses are engineered to carry roof loads outward to exterior walls; their bottom chords are typically 2x4 members rated only for ceiling drywall dead loads (5 to 10 psf).
Never cut, notch, drill, or remove web members of an engineered truss to make storage space. Doing so disrupts the entire load path and can cause catastrophic roof collapse.
Methods for Strengthening and Reinforcing Joists
When an inspection reveals that your framing members are undersized for your storage or conversion goals, you have several options to upgrade their load-carrying capacity. For detailed step-by-step procedures, consult this comprehensive DIY joist sistering guide.
Sistering and Reinforcing Attic Floor Joists
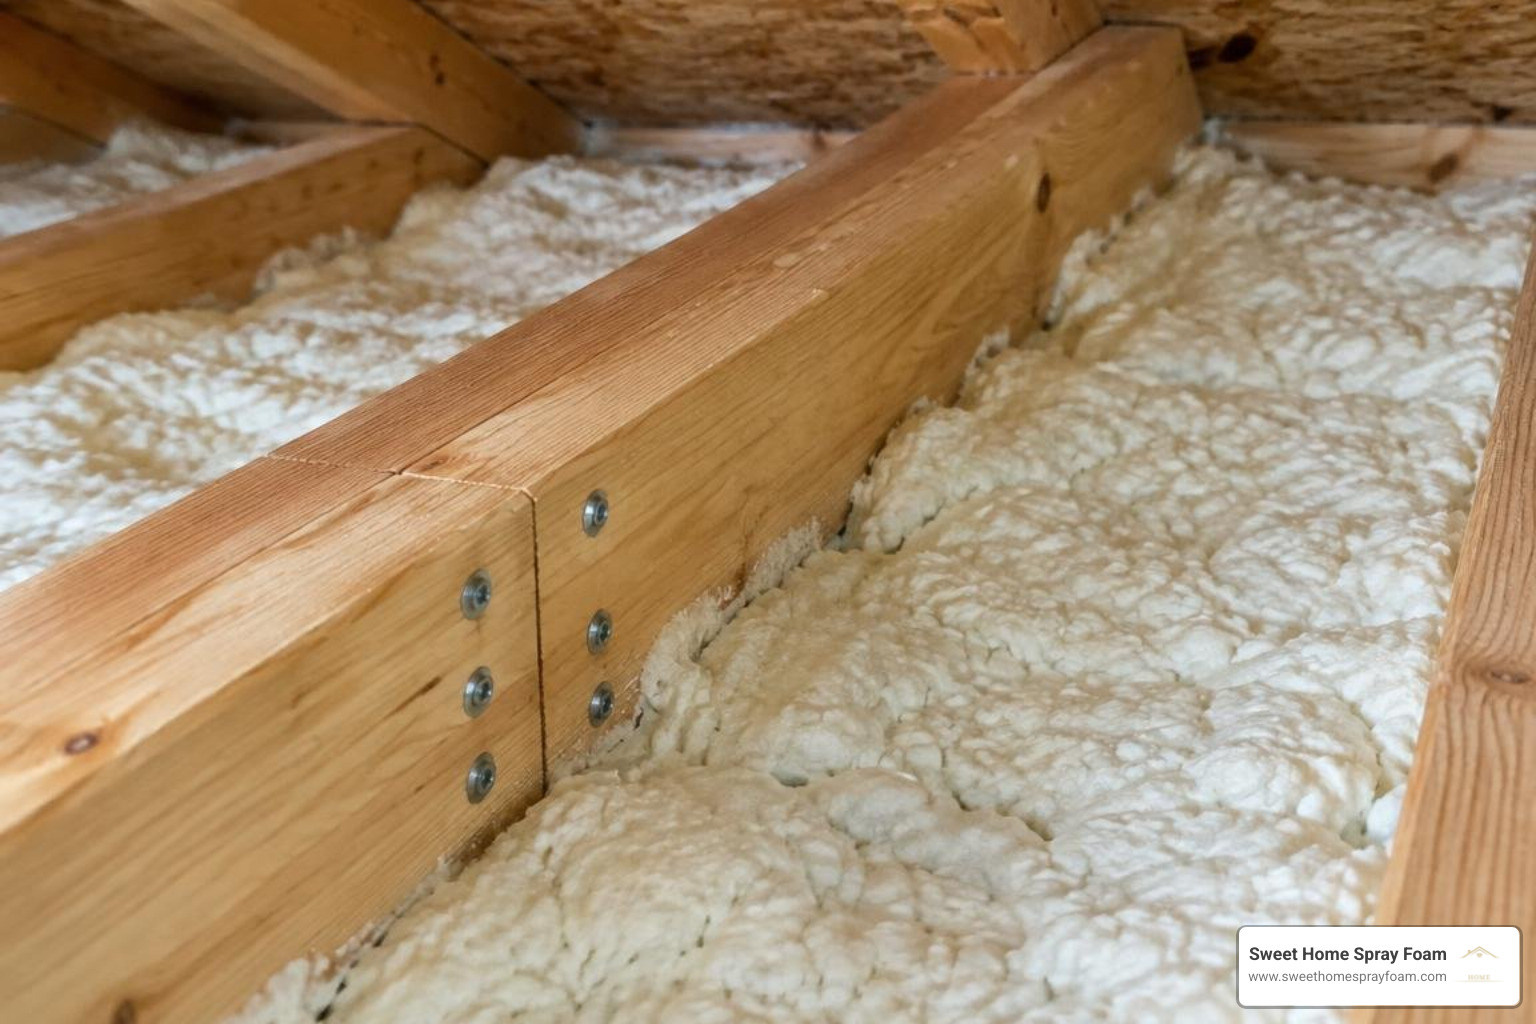
Sistering is the process of fastening a new, identically sized (or larger) framing member directly alongside the existing joist. When installed correctly, sistering can increase the framing bay's load capacity by roughly 50% to 100% while pulling minor sags out of the ceiling.
For maximum structural strength, apply this installation framework:
- Full-Span Sistering: The sister joist should run the entire clear span, resting directly on the same top plates or bearing walls at both ends with at least 1.5 inches of wood-bearing surface.
- Fastener Selection: Avoid standard drywall or deck screws, which are brittle and snap under shear stress. Use 10d ring-shank nails or 3-1/2-inch structural wood screws (such as Simpson Strong-Tie SDWS or FastenMaster TimberLOK).
- Staggered Fastening Pattern: Apply a continuous zig-zag fastener pattern. Place two fasteners every 12 to 16 inches along the span—one driven 1.5 inches from the top edge and the other 1.5 inches from the bottom edge.
- Structural Adhesive: Run two continuous beads of heavy-duty subfloor polyurethane adhesive along the face of the existing timber before clamping and securing the sister joist to eliminate future floor squeaks.
Cross-Bracing, Solid Blocking, and Engineered Lumber
- Solid Blocking: Installing short offcuts of matching dimensional lumber perpendicularly between joist bays at mid-span prevents joists from rolling or twisting under load (known as lateral torsional buckling). Blocking also helps transfer concentrated point loads across adjacent framing members.
- Cross-Bridging (Herringbone Bracing): Wood or metal criss-cross straps installed at mid-span that distribute point loads and improve floor stiffness without obstructing electrical wire runs.
- Engineered Lumber (LVL and I-Joists): When vertical headspace is limited and solid sawn lumber cannot achieve the required span, Laminated Veneer Lumber (LVL) or engineered wooden I-joists provide superior stiffness. An LVL beam resists warping and offers up to three times the bending strength of conventional dimensional lumber of the same depth.
- Steel Flitch Plates: A 1/4-inch to 1/2-inch structural steel plate sandwiched between two pieces of dimensional lumber, bolted together. This allows shallow joists (like 2x6s) to carry substantial loads over long spans without sacrificing ceiling height.
When to Hire a Structural Engineer vs. DIY
While laying subfloor panels or adding light mid-span blocking is well within the wheelhouse of an experienced DIYer, you should hire a licensed Professional Engineer (PE) if:
- The home uses engineered roof trusses and you want to install flooring.
- Existing framing shows rot, extensive termite damage, or severe sag exceeding 1 inch over a 12-foot span.
- You plan to convert the attic into a permitted habitable living space, bedroom, or bathroom (which requires plumbing penetrations and tile subfloors).
- Joists exceed maximum span tables, requiring mid-span drop beams or new load-bearing posts down to the home's foundation.
Subflooring, Insulation Preservation, and Building Code Compliance
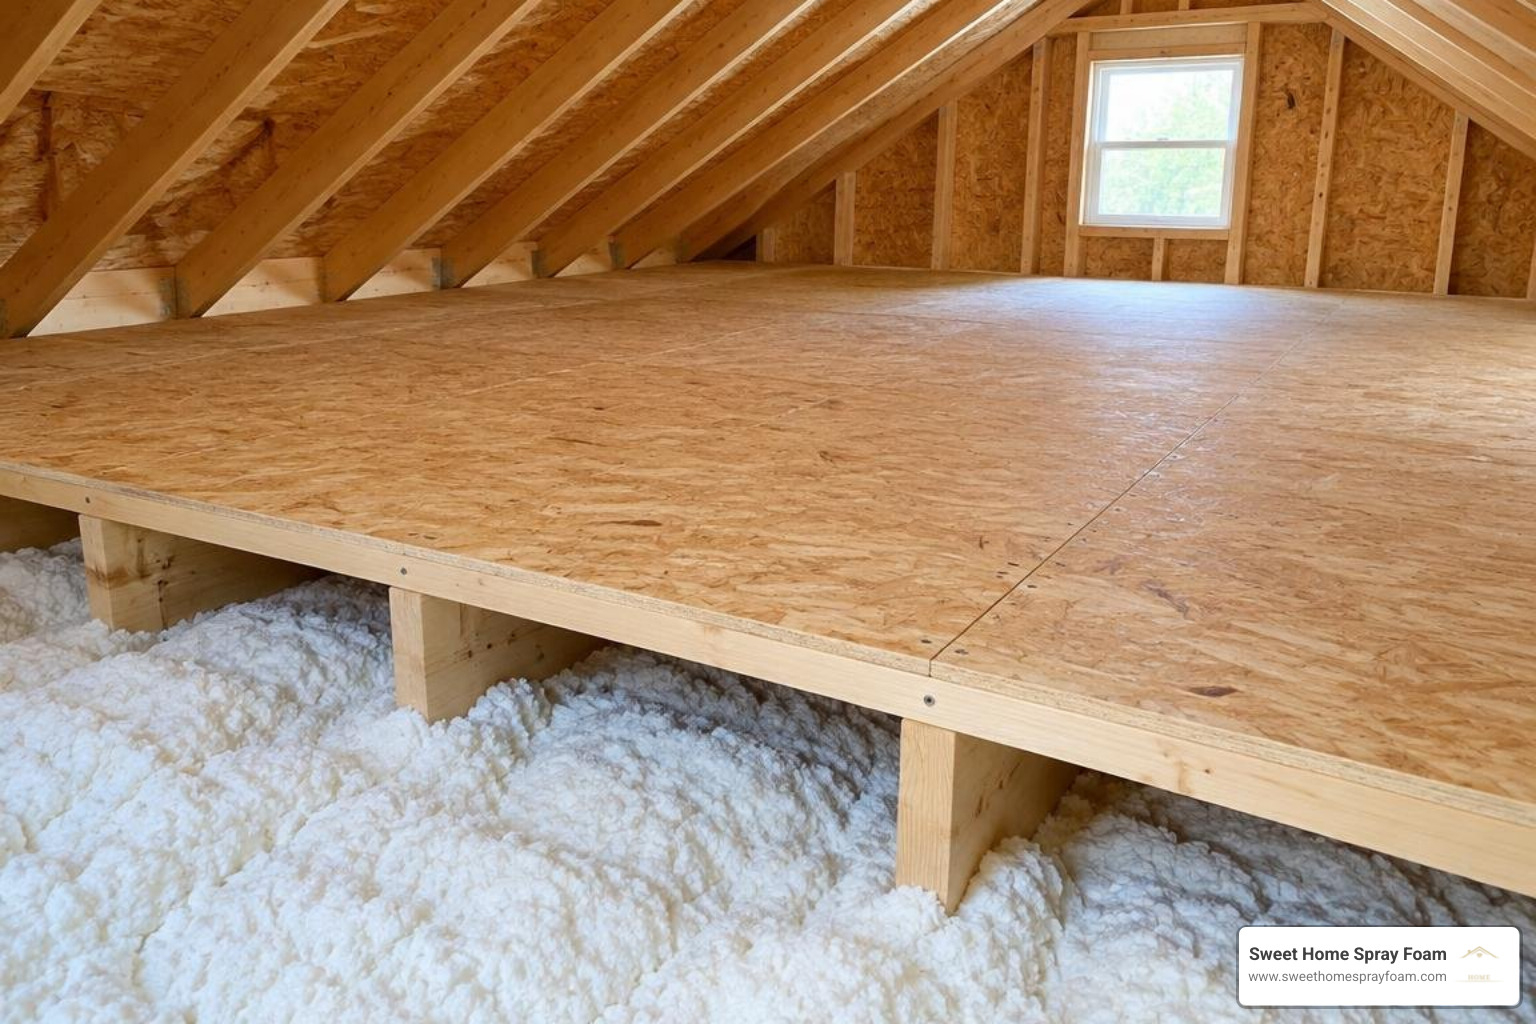
Adding usable floor space to an attic requires careful attention to thermal insulation and ventilation. In our work installing high-performance spray foam across Virginia, we routinely see homeowners crush their insulation or block ventilation paths with subfloor panels—inadvertently driving up their energy bills.
Choosing the Right Subfloor Decking Thickness
Your choice of decking material determines the floor's stiffness and stability underfoot:
- 1/2-inch Plywood/OSB: Suitable only for very light storage on joists spaced 16 inches on center. It will flex under adult body weight.
- 5/8-inch OSB or CDX Plywood: An acceptable minimum for general storage on 16-inch OC framing.
- 3/4-inch Tongue-and-Groove (T&G) Plywood or OSB (e.g., AdvanTech): The gold standard. The interlocking tongue-and-groove edges lock the panel seams together, preventing edge deflection between joists without requiring solid backing blocks beneath every seam.
Fasten subfloor panels using 2-1/2-inch or 3-inch star-drive structural wood screws spaced 6 inches along panel edges and 12 inches along intermediate joists (the "field"). Always leave a 1/8-inch expansion gap between panel edges to allow for natural seasonal humidity swings.
Installing Raised Flooring Over Attic Insulation
In modern homes, floor-level attic insulation often stands 10 to 14 inches deep to achieve target thermal resistance values (such as R-38 or R-49). If you compress 12 inches of loose fiberglass or cellulose down to 5.5 inches beneath a sheet of plywood, you reduce its thermal resistance by 30% to 50%, creating cold spots and winter condensation on the ceiling below.
To prevent insulation compression, use one of these two approaches:
- Cross-Sleeper Joists: Install 2x4 or 2x6 framing lumber perpendicularly across the tops of your existing joists. This creates an elevated, cross-hatched grid that accommodates deep insulation while giving you an elevated platform to fasten subfloor decking.
- Unvented Hot Roof Conversion: Rather than placing insulation at the attic floor level, you can encapsulate the entire attic by applying attic spray foam insulation directly to the underside of the roof deck. As detailed in our 2026 attic insulation guide, moving the building's thermal envelope to the roofline converts your attic into clean, conditioned space. This eliminates the risk of floor insulation compression entirely and protects your stored belongings from extreme temperature spikes.
If you maintain a traditionally vented attic floor, make sure your decking does not cover soffit vents. Install rigid rafter baffles (accu-vents) along the eaves to preserve a continuous 2-inch airflow channel from the soffit to the ridge vent. For further details on keeping crawl spaces and attic assemblies balanced, explore our guide to attic and crawl space insulation.
Building Codes, Egress, and Ceiling Height Requirements
If your project goes beyond basic storage and aims to create a finished living area, local building codes (governed by IRC Section R305 and R502) enforce strict structural and safety standards:
- Minimum Floor Area: Habitable rooms must have a floor area of not less than 70 square feet, with a minimum horizontal dimension of 7 feet in any direction.
- Ceiling Height Rules: At least 50% of the required habitable area must have a finished ceiling height of at least 7 feet (84 inches). Portions of the room with a sloped ceiling measuring less than 5 feet in vertical height cannot be counted toward the minimum floor area calculation.
- Emergency Egress: Any habitable attic space or bedroom must feature an approved emergency escape and rescue opening (typically an egress window with a minimum net clear opening of 5.7 sq ft) or a secondary stairwell.
- Permits: While rough storage decks over sound existing joists often do not require municipal permits, structural joist alterations, electrical sub-panels, HVAC installations, and habitable conversions legally require building permits and framing inspections. You can learn more about framing and insulation dynamics in our comprehensive insulation education section.
Frequently Asked Questions About Attic Joists
Can you walk directly on 2x4 ceiling joists in an attic?
You should never walk directly on exposed 2x4 ceiling joists without temporary walking planks. Standard 2x4 joists are designed only to suspend drywall ceilings and insulation under a 5 to 10 psf dead load. Stepping directly onto the center of an unsupported 2x4 can bow the wood, crack the plaster or drywall ceiling below, or cause you to slip and fall straight through the ceiling. When navigating an unfinished attic, lay a 3/4-inch piece of plywood across at least three separate joists to distribute your weight evenly over multiple framing members.
Does installing 3/4-inch plywood increase attic joist load capacity?
No. Installing 3/4-inch subfloor decking stiffens the walking surface and eliminates flex between the joists, but it does not increase the vertical bending strength or load-bearing rating of the underlying joists themselves. In fact, adding 3/4-inch plywood increases the permanent dead load on the framing by roughly 2.2 pounds per square foot. If your joists are undersized for the span, adding heavy plywood will only bring them closer to their deflection and failure limits.
Do you need a building permit to add attic flooring?
If you are simply securing a few sheets of plywood or modular plastic storage panels over existing framing to hold lightweight seasonal totes, most local building departments do not require a permit. However, if your project involves cutting, sistering, or altering structural framing members, adding permanent staircases, extending electrical wiring, or finishing the attic into a habitable living space, you must obtain a residential building permit and schedule framing inspections to remain code-compliant.
Conclusion
Maximizing your home's overhead footprint begins with understanding the structural capacity of your framing. Before loading boxes or installing subfloor panels, measure your lumber dimensions, verify on-center spacing, calculate unsupported spans against IRC load standards, and make sure your plans preserve your attic's thermal envelope and ventilation.
If you are planning an attic conversion or want to improve your home's seasonal comfort and energy efficiency across Virginia—including Richmond, Roanoke, Lynchburg, and Smith Mountain Lake—our team at Sweet Home Spray Foam is here to help. We provide clear, upfront pricing, pressure-free assessments, and expert guidance on local utility rebates to help you build a durable, comfortable, and energy-efficient home.