
Crawl Space Insulation Replacement Starts With a Dry Crawl Space
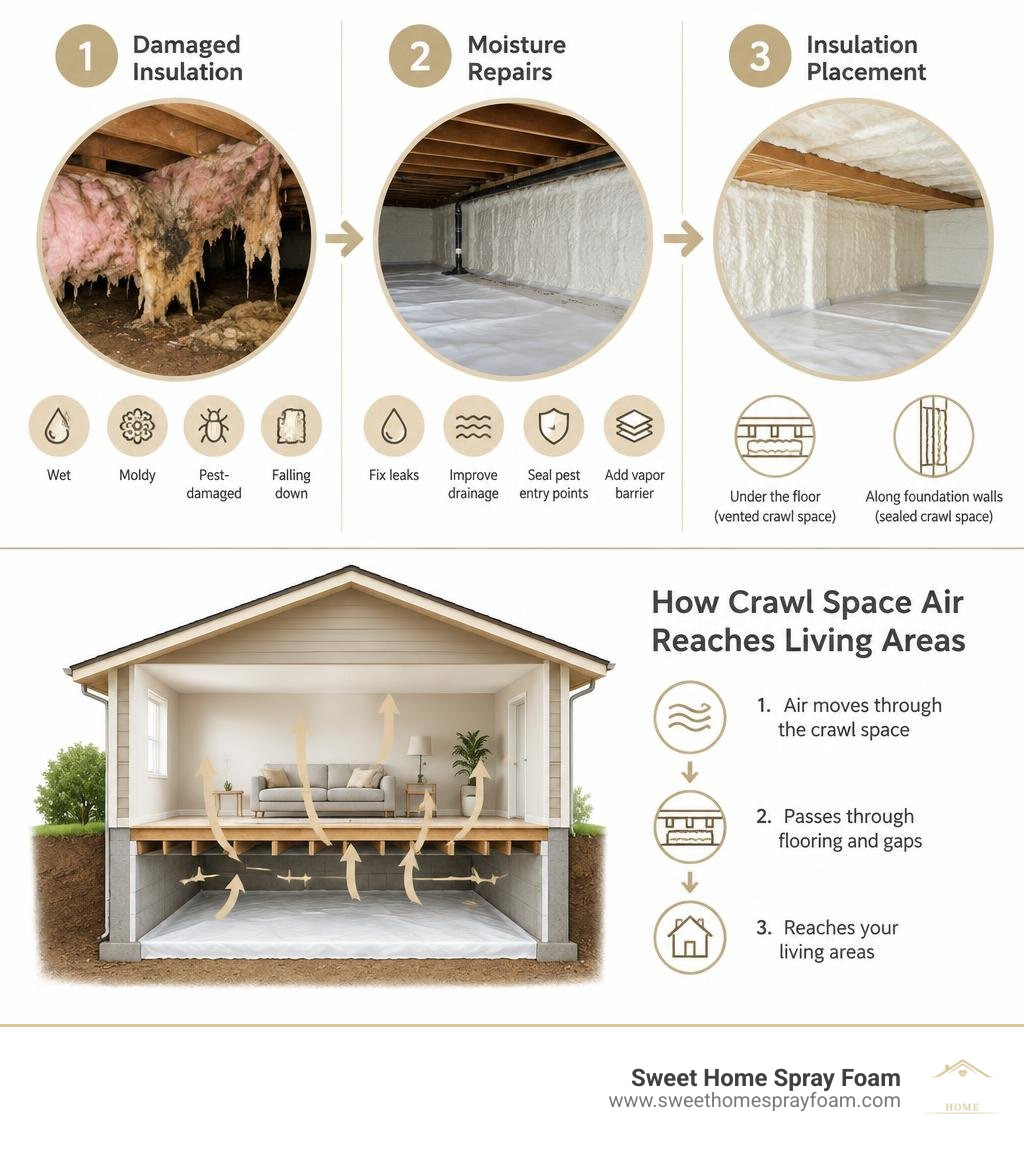
If your crawl space insulation is wet, moldy, pest-damaged, or falling down, replace the affected sections. First, fix leaks and drainage problems, remove damaged material, seal pest entry points, and cover bare soil with a sealed vapor barrier. Then choose where to insulate: under the floor in a vented crawl space, or along the foundation walls in a properly sealed crawl space.
That order matters. New insulation will not stay effective if moisture keeps getting in. A dry, continuous barrier can help reduce drafts, cold floors, and wasted heating and cooling energy.
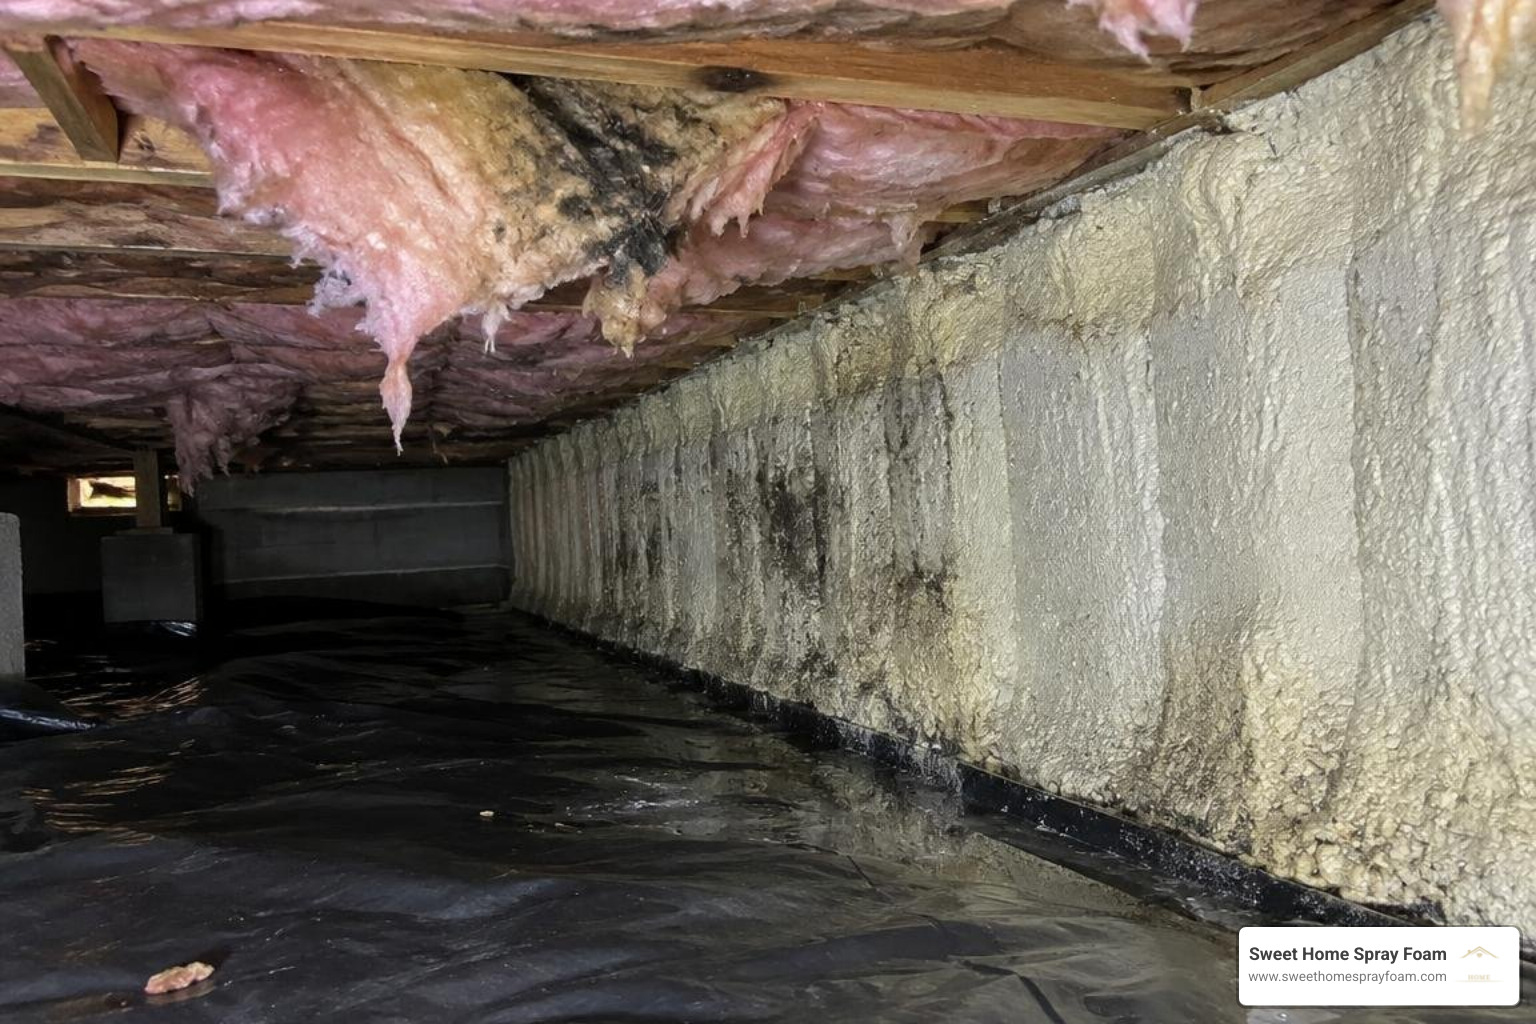
Signs You Need Crawl Space Insulation Replacement
Half of all crawl space insulation in the United States is compromised—hanging by a single wire stay, soaked with condensation, or resting in the dirt. Because crawl spaces are out of sight, insulation failures often go unnoticed until they affect indoor living conditions.
Watch for these warning signs:
- Sagging or Fallen Batts: Fiberglass batts absorb moisture from humid air like a sponge. As they gain water weight, gravity pulls them down, creating thermal gaps.
- Musty Odors and Mold Growth: The "stack effect" draws air from the foundation upward into the living space. If your home smells earthy or damp, mold spores from the crawl space are circulating through floorboards and duct joints.
- Freezing Floors and Drafts: When insulation separates from the subfloor, cold outdoor air chills your flooring and drives up heating costs.
- Pest Infestations: Rodents and insects target loose fibrous insulation for nesting material, leaving droppings, urine, and tunnels behind.
- High Indoor Humidity: If summer indoor relative humidity routinely tops 60%, moisture evaporating from the crawl space soil is likely overwhelming your air conditioner.
When to Repair vs. Complete Replacement
Not every crawl space requires a complete cleanout. If minor pest damage or mechanical work loosened a small, dry section of insulation, spot repairs will do. You can re-secure the insulation with wire stays or replace a single bay using clean material.
A complete tear-out and replacement is necessary when:
- Moisture Saturation: Insulation that has been wet loses its loft permanently. Compressing or soaking fiberglass destroys the air pockets that give it an R-value.
- Extensive Mold or Wood Rot: If mold has established colonies on joists or subflooring behind batts, the insulation must come out so framing can dry and receive treatment.
- Widespread Biohazards: Rodent waste creates airborne contaminants. Contaminated materials should be cleared and the area sanitized before installing new barriers.
The Hidden Impact of Ground Moisture and Ductwork Leaks
Bare soil is the largest contributor to crawl space humidity. A typical 1,500-square-foot crawl space releases 10 to 15 gallons of water vapor daily through natural soil evaporation.
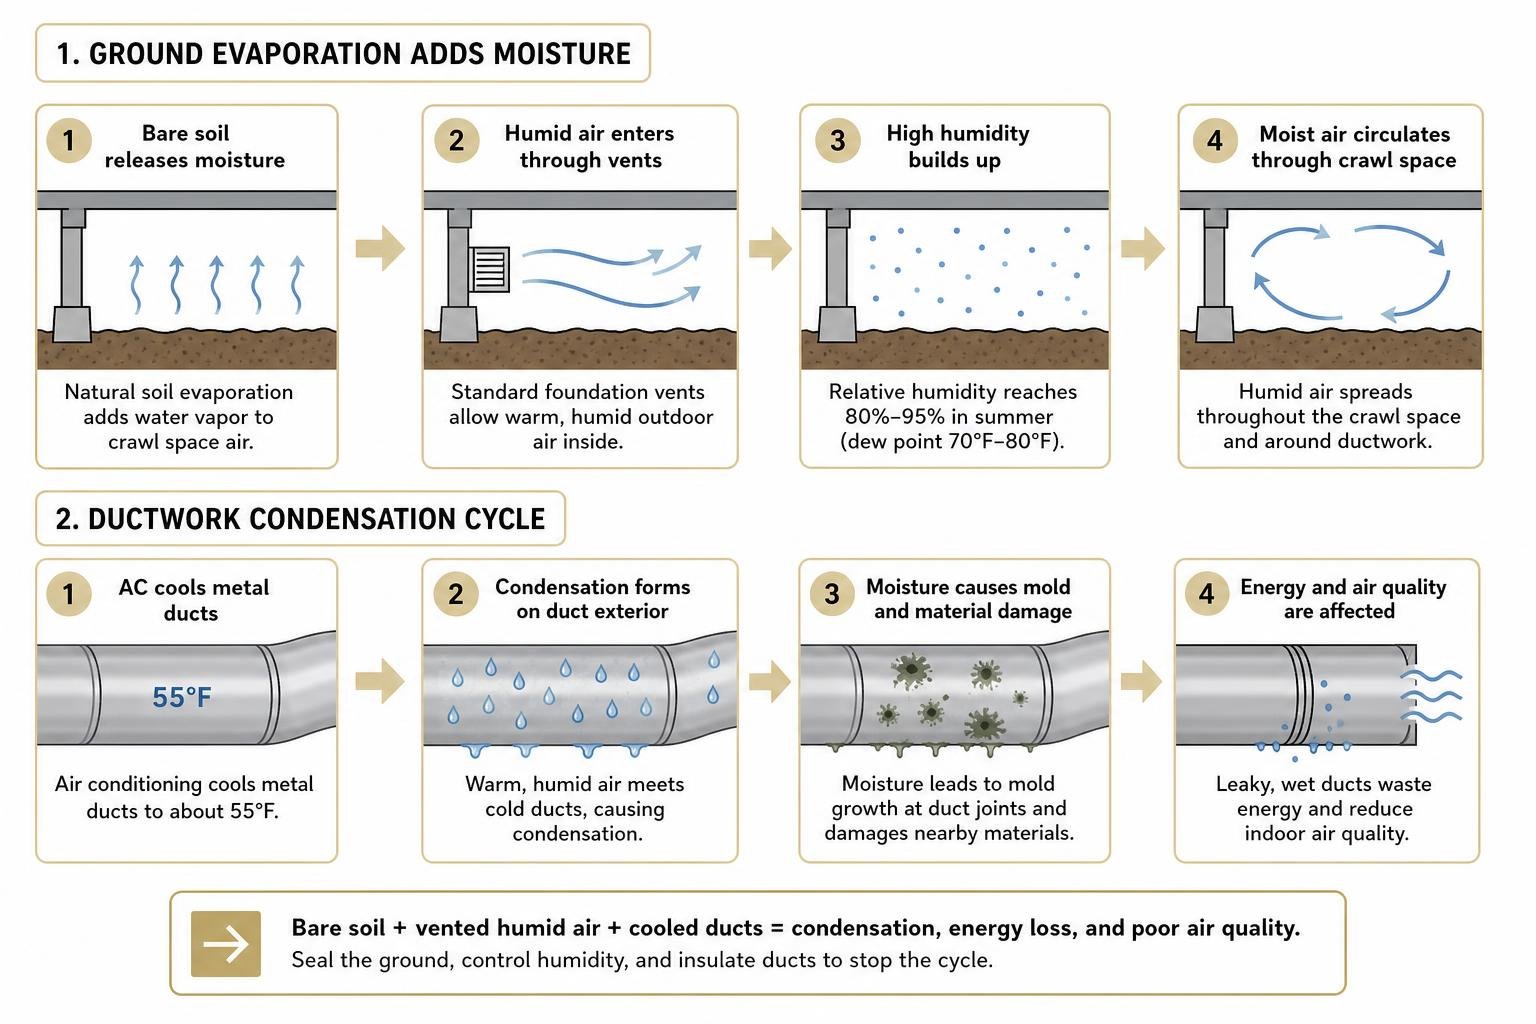
Roughly 15% of American homes have ductwork installed in crawl spaces. When humid outdoor air enters through standard foundation vents during summer, relative humidity reaches 80% to 95%, with dew points between 70°F and 80°F. When air conditioning cools metal ducts down to 55°F, condensation rapidly forms on the outside.
According to the U.S. Department of Energy, duct systems in unconditioned spaces lose 15% to 30% of heating and cooling energy. Following modern guidelines for crawl space duct insulation prevents this condensation cycle, stops mold growth at duct joints, and protects air quality.
Vented vs. Unvented: Materials and Strategy Selection
The two main approaches for crawl space retrofits are vented floor insulation and unvented wall encapsulation.
| Feature | Vented Crawl Space (Floor Insulated) | Unvented Crawl Space (Wall Encapsulated) |
|---|---|---|
| Insulation Location | Subfloor joist bays | Foundation perimeter walls & band joists |
| Thermal Boundary | Directly beneath the living room subfloor | At the foundation perimeter (mini-basement) |
| Ductwork Environment | Exposed to outside heat and humidity | Kept inside the conditioned thermal envelope |
| Duct Energy Loss | High (20% – 30%) | Low (5% – 15%) |
| Relative Humidity | Fluctuates with outdoor weather (80%+ summer) | Controlled year-round (50% – 60%) |
| Best Suited For | Dry, arid climates or flood-prone properties | Humid climates (Southeast, Mid-Atlantic) |
For most homes, pairing proper crawl space treatment with comprehensive attic and crawl space insulation creates an airtight, energy-efficient building envelope from top to bottom.
Selecting the Best Insulation Materials
Selecting the right material determines whether an installation lasts decades or fails within a few seasons:
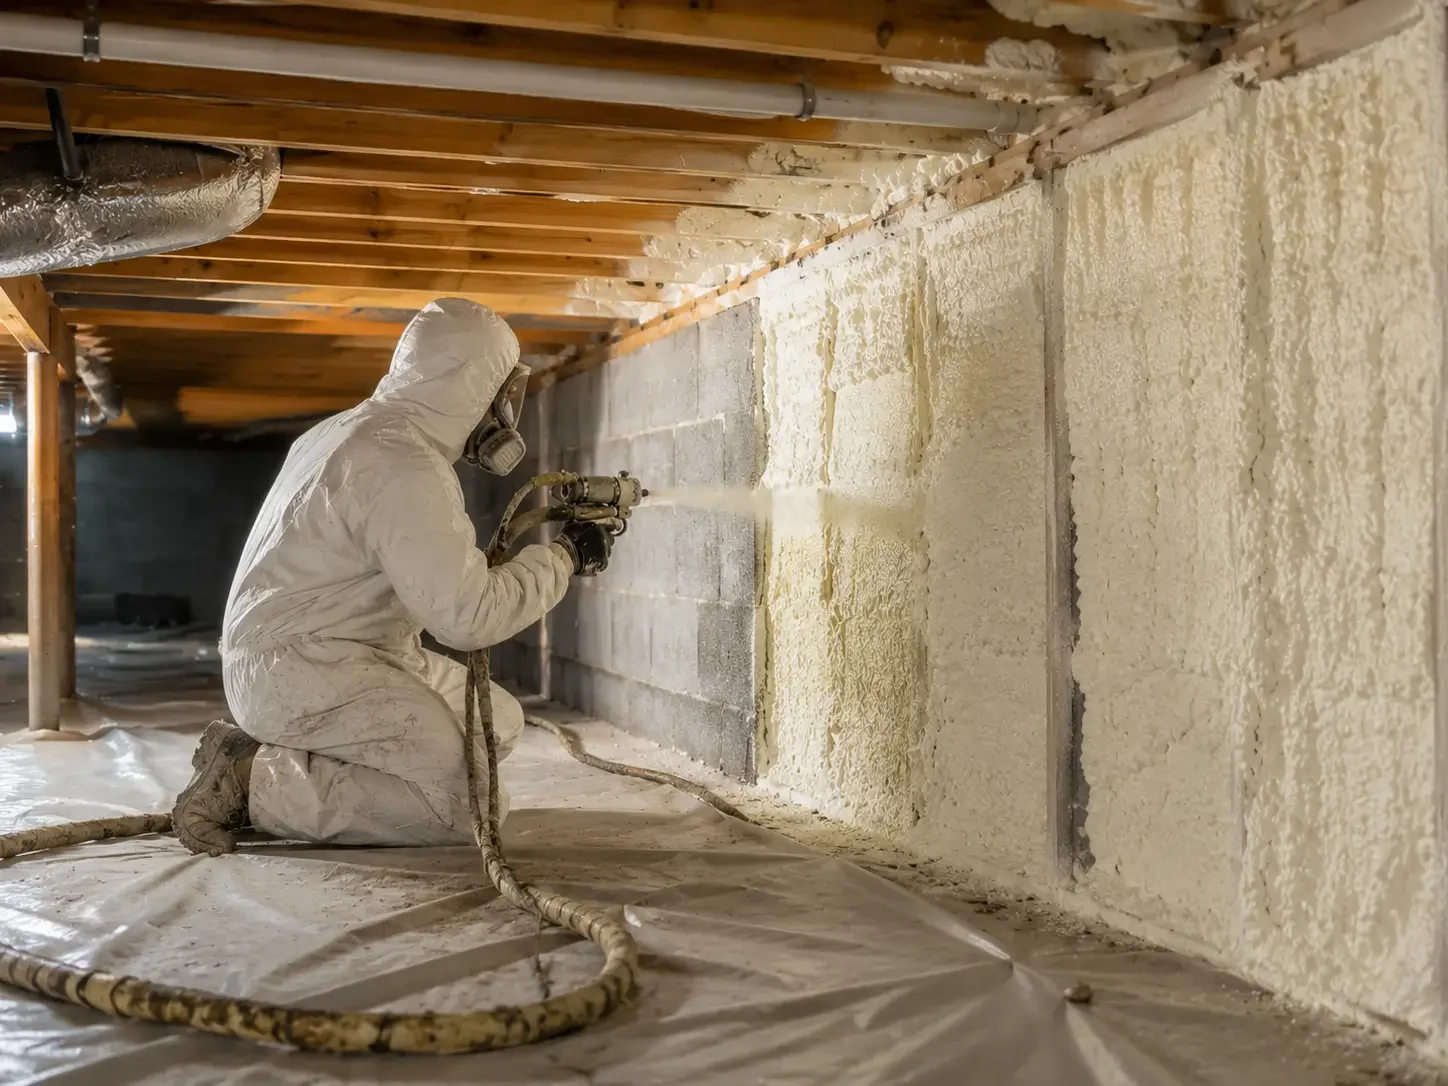
- Closed-Cell Spray Foam: The gold standard for foundation walls and rim joists. Applied directly to masonry and framing, crawl space spray foam insulation expands to fill air leaks, creates a built-in Class II vapor retarder, and delivers an R-value of R-6.0 to R-7.0 per inch.
- Rigid Foam Board (XPS or Polyisocyanurate): Extruded polystyrene (XPS, R-5.0/inch) and polyiso (R-6.0 to R-6.5/inch) work well on flat masonry foundation walls. Panels must be mechanically fastened and sealed at all joints.
- Mineral Wool Batts: If you are insulating subfloor bays in a vented layout, mineral wool provides higher moisture resistance, fire resistance, and structural density than standard fiberglass.
- Fiberglass Batts: An economical option for subfloor joists in dry climates, but susceptible to moisture absorption, sagging, and pest damage in humid regions.
Moisture Barriers and Groundcover Specifications
As outlined in Building Science Corporation Information Sheet 512, ground moisture control is mandatory regardless of your insulation strategy. Thin 6-mil construction poly works as a minimum standard, but it tears easily when crawled upon. A durable 10-mil to 20-mil reinforced polyethylene membrane provides the puncture resistance required for long-term service.
Run the membrane across the dirt, overlap seams by at least 12 inches, seal the joints with dedicated vapor-tape, and extend the liner up the foundation walls to create an impenetrable barrier against ground evaporation.
Step-by-Step Guide to Crawl Space Insulation Replacement
Method A: Unvented Wall Insulation and Full Encapsulation
Modern building science favors treating the crawl space as a mini-basement. As outlined in the Building America guide on unvented, insulated crawlspaces, turning the crawl space into a conditioned area eliminates thermal loss through subfloors and ductwork.
- Site Prep and Moisture Management: Clear debris, level the soil, divert exterior downspouts 4 to 6 feet away, and install a sump pump if standing water is present.
- Vent Sealing: Seal all foundation vents airtight using rigid foam inserts, exterior vent covers, and expanding foam sealant.
- Ground Membrane Installation: Lay heavy 10-mil to 20-mil vapor barrier over the soil. Overlap seams by 12 inches, seal them with waterproof tape, and run the membrane up foundation walls to your designated termination line.
- Wall Insulation Attachment: Fasten rigid foam boards or spray closed-cell polyurethane foam along interior foundation walls. When using rigid foam, seal every seam with compatible mastic or expanding foam.
- Rim and Band Joist Sealing: Air-seal and insulate the rim joists—the primary source of perimeter air infiltration—using 2 to 3 inches of closed-cell spray foam.
- Conditioning and Drying: Install an energy-efficient, self-draining crawl space dehumidifier set to 50%–55% RH, or provide conditioned supply air (minimum 1 cfm per 50 sq. ft. of crawl space area).
Method B: Vented Floor Joist Insulation Installation
For detailed subfloor techniques, consult this resource on How To Install Insulation Under Floor In Crawl Space. If you choose to maintain a vented layout:
- Prep the Ground: Install a continuous 6-mil or 10-mil poly vapor barrier over the dirt to minimize rising ground moisture.
- Air Seal First: Before placing any batts, crawl the area with canned foam or caulk to seal wire penetrations, plumbing drops, and duct boots penetrating the subfloor.
- Cut and Fit: Cut batt insulation to friction-fit snugly between joists without over-compressing the material.
- Position the Vapor Retarder: When using faced batts, ensure the kraft paper faces upward against the warm subfloor, not downward toward the dirt.
- Secure Structurally: Fasten wire insulation stays ("tiger teeth") or crisscrossed nylon twine every 12 to 16 inches to prevent sagging over time.
Critical Installation Mistakes to Avoid
- Reversing Vapor Retarder Facing: Placing faced insulation with the paper pointing down traps warm, moist indoor air against the subfloor during winter, causing structural rot.
- Compressing Insulation Batts: Squeezing R-30 batts into 2x6 joist bays crushes the insulating air pockets and cuts real thermal performance in half.
- Insulating Over Wet Wood: Never install spray foam or dense batts over damp subflooring. Framing moisture content must be below 18% before insulation begins.
- Ignoring Rim Joists: Leaving band joists uninsulated permits heavy perimeter air infiltration that cancels out the benefits of floor batts.
- Skipping the Ground Cover: Insulating joists over bare dirt without a vapor barrier causes fiberglass to absorb rising ground steam and drop within seasons.
Costs, Energy Savings, and Code Compliance
The investment required for crawl space upgrades depends on the condition of the space, chosen materials, and whether you insulate the subfloor or encapsulate the perimeter.
| Upgrade Method | Typical Cost (1,200 sq. ft.) | Annual Energy Savings | Estimated Payback Period |
|---|---|---|---|
| DIY Vented Subfloor (Fiberglass/Poly) | $1,500 – $3,000 | $200 – $350 | 4 – 8 years |
| Pro Vented Subfloor (Mineral Wool/Air Seal) | $2,500 – $4,500 | $300 – $450 | 5 – 9 years |
| Pro Wall Spray Foam + Rim Joist Sealing | $3,500 – $6,500 | $400 – $650 | 5 – 8 years |
| Full Pro Encapsulation + Dehumidifier | $5,000 – $12,000+ | $600 – $1,000 | 5 – 8 years* |
*Full encapsulation payback accounts for avoided floor repairs, lower HVAC maintenance, and energy savings.
Homeowners reviewing overall investment levels can review our breakdown of the average crawl space encapsulation cost across different home configurations.
Long-Term Payback of Crawl Space Insulation Replacement
A quality insulation upgrade pays for itself across several categories:
- Direct Utility Reductions: Encapsulating a crawl space that contains ductwork cuts HVAC thermal losses by 15% to 30%, lowering power bills immediately.
- Prevented Mold Remediation: Remediating a mold-infested subfloor averages $3,000 to $10,000 per incident. A dry crawl space prevents moisture damage before it starts.
- HVAC Equipment Longevity: Removing extreme crawl space humidity reduces run cycles and prevents premature AC compressor breakdowns.
- Increased Property Value: A dry, clean, encapsulated crawl space is a significant selling feature that protects foundation appraisal values during home sales.
Building Codes, Fire Safety, and Pest Inspection Requirements
Crawl space modifications must comply with International Residential Code (IRC) and local safety standards:
- Thermal and Ignition Barriers: Foam plastics (spray foam and rigid boards) installed in crawl spaces accessible for servicing utilities require an approved ignition barrier (such as 1.5-inch mineral fiber, 0.25-inch wood structural panels, or 3/8-inch gypsum) unless the specific foam formulation is code-tested for exposed use.
- Termite Inspection Strips: In termite-prone areas, local building codes mandate leaving a 3-inch bare concrete inspection gap between the top of the foam insulation and the wood sill plate so pest inspectors can spot mud tubes.
- Radon and Combustion Safety: If naturally drafting gas furnaces or water heaters draw air from the crawl space, an HVAC technician must verify sufficient combustion air before vents are sealed.
- Flood Zones: Homes in designated flood hazard areas must keep engineered flood vents clear and operational rather than sealed with permanent foam.
Frequently Asked Questions About Crawl Space Insulation
Which way should the paper vapor retarder face on floor joist batts?
The kraft paper vapor retarder should face upward, directly touching the underside of the warm subfloor. This allows indoor moisture to pass safely without condensing inside the floor structure. Installing kraft paper facing down toward the crawl space traps moisture against the floor framing and promotes mold.
Can I encapsulate my crawl space without adding wall insulation right away?
Yes. If your immediate budget is limited, installing a heavy ground vapor barrier, sealing the vents, and running a crawl space dehumidifier addresses moisture issues right away. You can apply closed-cell foam or rigid wall insulation down the road to capture full thermal efficiency benefits.
What R-value is required for crawl space walls and floors?
Under the International Energy Conservation Code (IECC), subfloor insulation in vented crawl spaces generally requires R-19 in moderate regions (Climate Zones 3–4) and R-30 in colder areas (Zones 5+). For unvented wall encapsulation, continuous rigid board or closed-cell spray foam typically requires R-10 to R-15 continuous insulation, depending on your climate zone.
Conclusion
Upgrading failing crawl space insulation improves whole-home comfort, protects indoor air quality, and lowers monthly heating and cooling bills. Leaving old, wet insulation beneath your subfloor allows mold growth, invites pests, and wastes conditioned air through unsealed framing and leaky ductwork.
At Sweet Home Spray Foam, we help homeowners in Richmond, Roanoke, Lynchburg, and Smith Mountain Lake transform damp, problematic crawl spaces into clean, dry, energy-efficient foundations. We provide clear upfront pricing, pressure-free assessments, and full guidance on available energy efficiency rebates. Contact us today to schedule your crawl space evaluation.