
Basement Framing and Insulation Starts With a Dry Wall
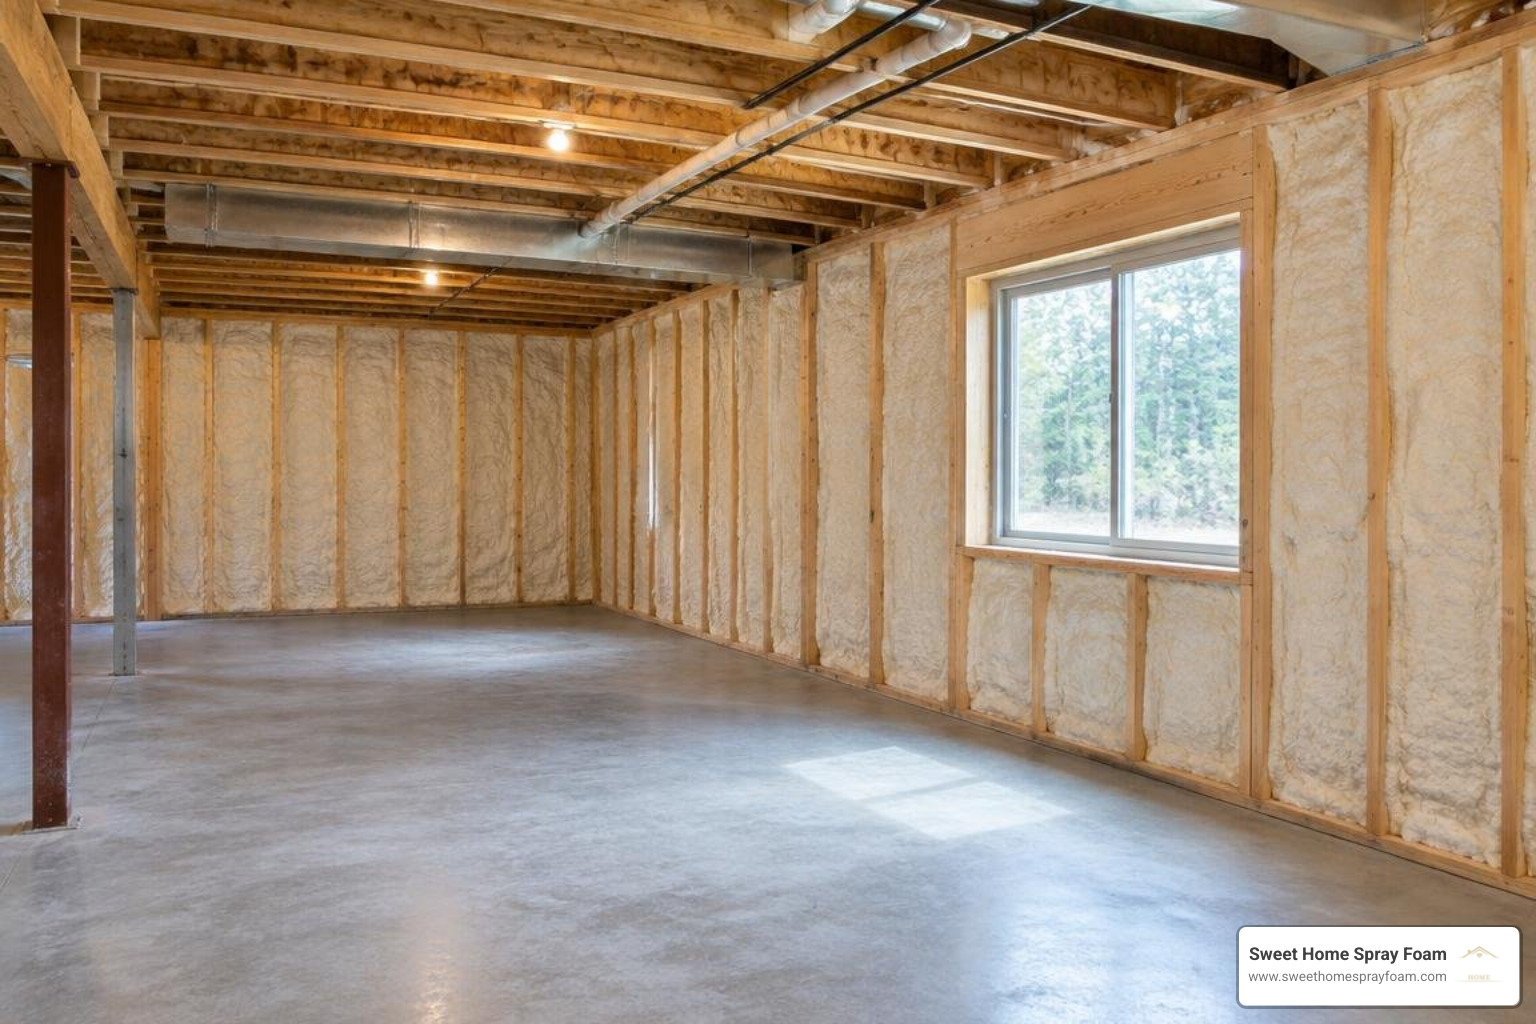
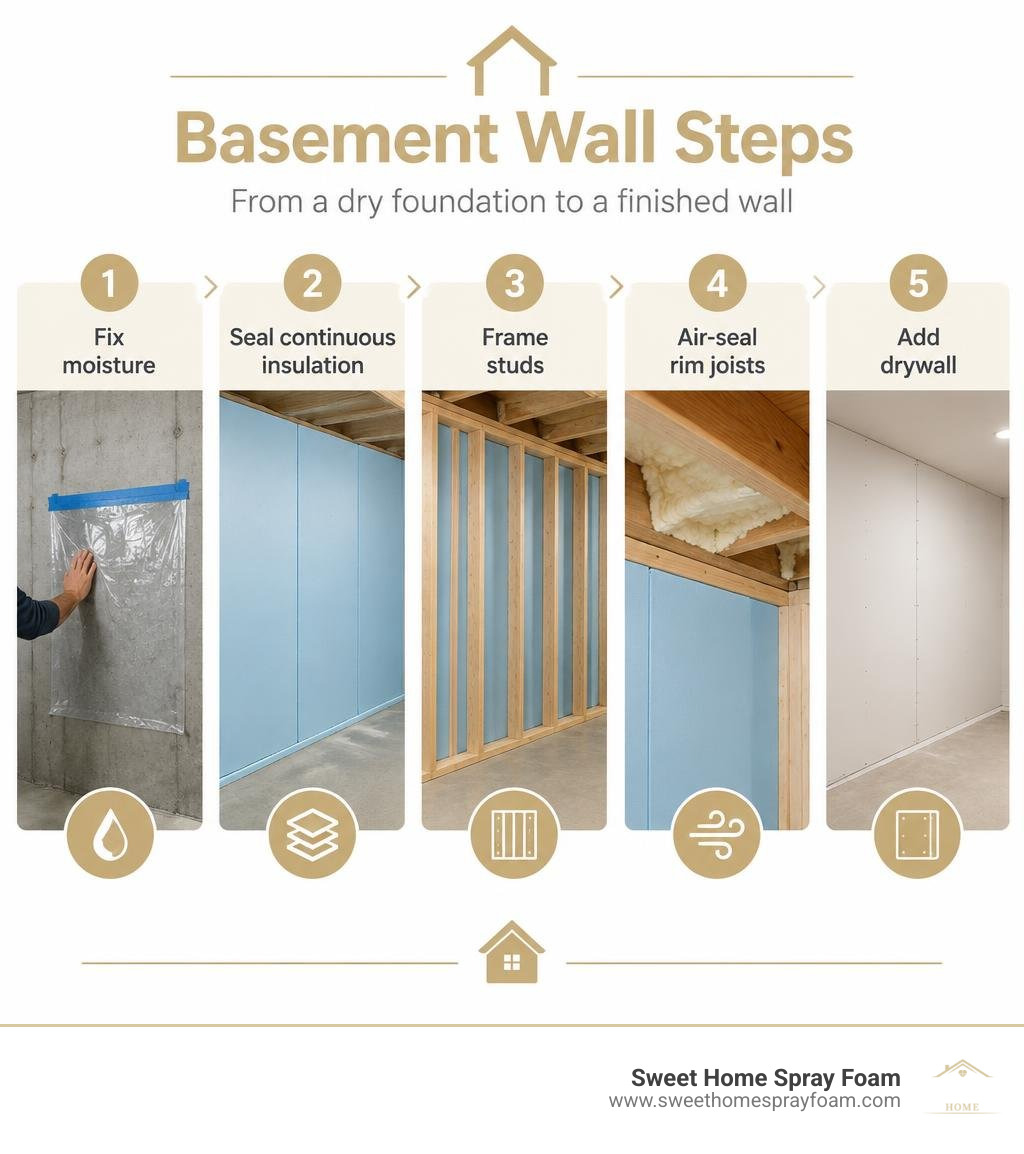
For basement framing and insulation, fix leaks and check the foundation for moisture before covering it. Then install a continuous, sealed insulation layer against the foundation, frame the wall in front of it, air-seal the rim joists, and cover exposed foam with a code-approved finish such as drywall. Do not add polyethylene sheeting by default; it can trap moisture in the wall.
That order matters in Virginia homes. A basement can account for about a quarter of a home's heat loss, but insulation will not fix a wet foundation. The goal is a wall that stays dry, blocks drafts, and is ready for inspection before drywall goes up.
Pre-Framing Assessment: Moisture Testing and Foundation Prep
Concrete is porous. It acts like a giant, dense sponge that wicks water from damp soil via capillary action and releases it inside your home as water vapor. Before building frames or hanging insulation, you must identify whether moisture is leaking through or simply condensing on the wall surface.
Start by inspecting for bulk water leaks, fine hairline cracks, and white chalky powder known as efflorescence. Efflorescence occurs when moisture evaporates off masonry surfaces and leaves behind mineral salts. If you notice structural or water-seeping cracks, chisel them out into an inverted V-notch and seal them with hydraulic cement or specialized masonry sealants. Fix grading around your home's exterior and extend downspouts at least six feet away from your foundation to prevent water buildup.
Diagnosing Wall Moisture with the Plastic Sheet Test
The plastic sheet test determines if your basement foundation suffers from inward vapor drive or simple room-level condensation.
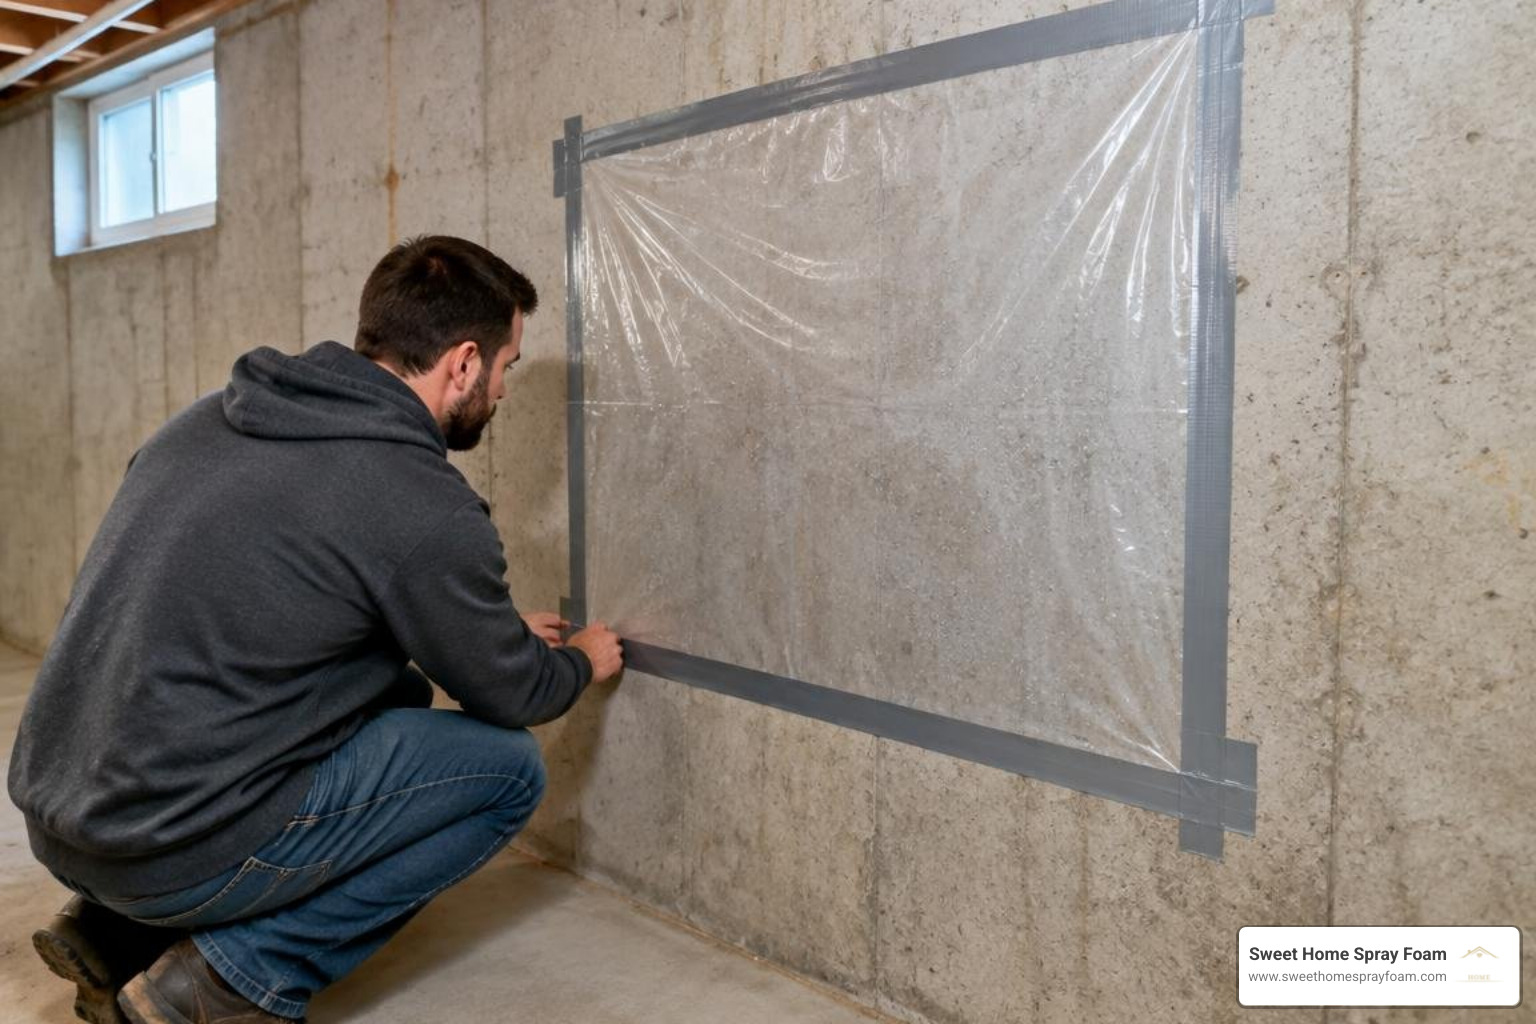
- Cut a 2-foot by 2-foot square of clear polyethylene sheeting or heavy-duty plastic wrap.
- Tape all four edges securely to an exterior-facing concrete wall using moisture-resistant tape.
- Repeat the process on your concrete slab floor.
- Leave the plastic undisturbed for 24 to 48 hours.
After 48 hours, check the plastic:
- Moisture on the outside (room-facing side): The humidity inside your basement is too high and condensing against the cool wall. Running a dehumidifier during construction will solve this issue.
- Moisture on the inside (wall-facing side): Water vapor is migrating through your concrete wall from the soil. You must address dampness and grading issues before moving forward.
Reviewing a DIY wall insulation complete guide will help you understand moisture dynamics and wall assemblies before you begin hanging framing materials.
Interior vs. Exterior Foundation Insulation
While excavating the foundation to insulate from the outside provides continuous protection from freeze-thaw cycles, interior retrofitting is usually the practical choice for existing homes.
| Factor | Interior Insulation Approach | Exterior Insulation Approach |
|---|---|---|
| Average Cost | Lower; no excavation required | High; requires deep trenching |
| Thermal Protection | Excellent when properly air-sealed | Excellent; eliminates thermal bridges |
| Installation Difficulty | Moderate; ideal for finishing projects | Complex; disrupts landscaping/patios |
| Moisture Management | Requires careful vapor drive control | Keeps foundation warm and dry |
| Best Application | Basement remodels and conversions | New construction or major restorations |
Step-by-Step Best Practices for Basement Framing and Insulation
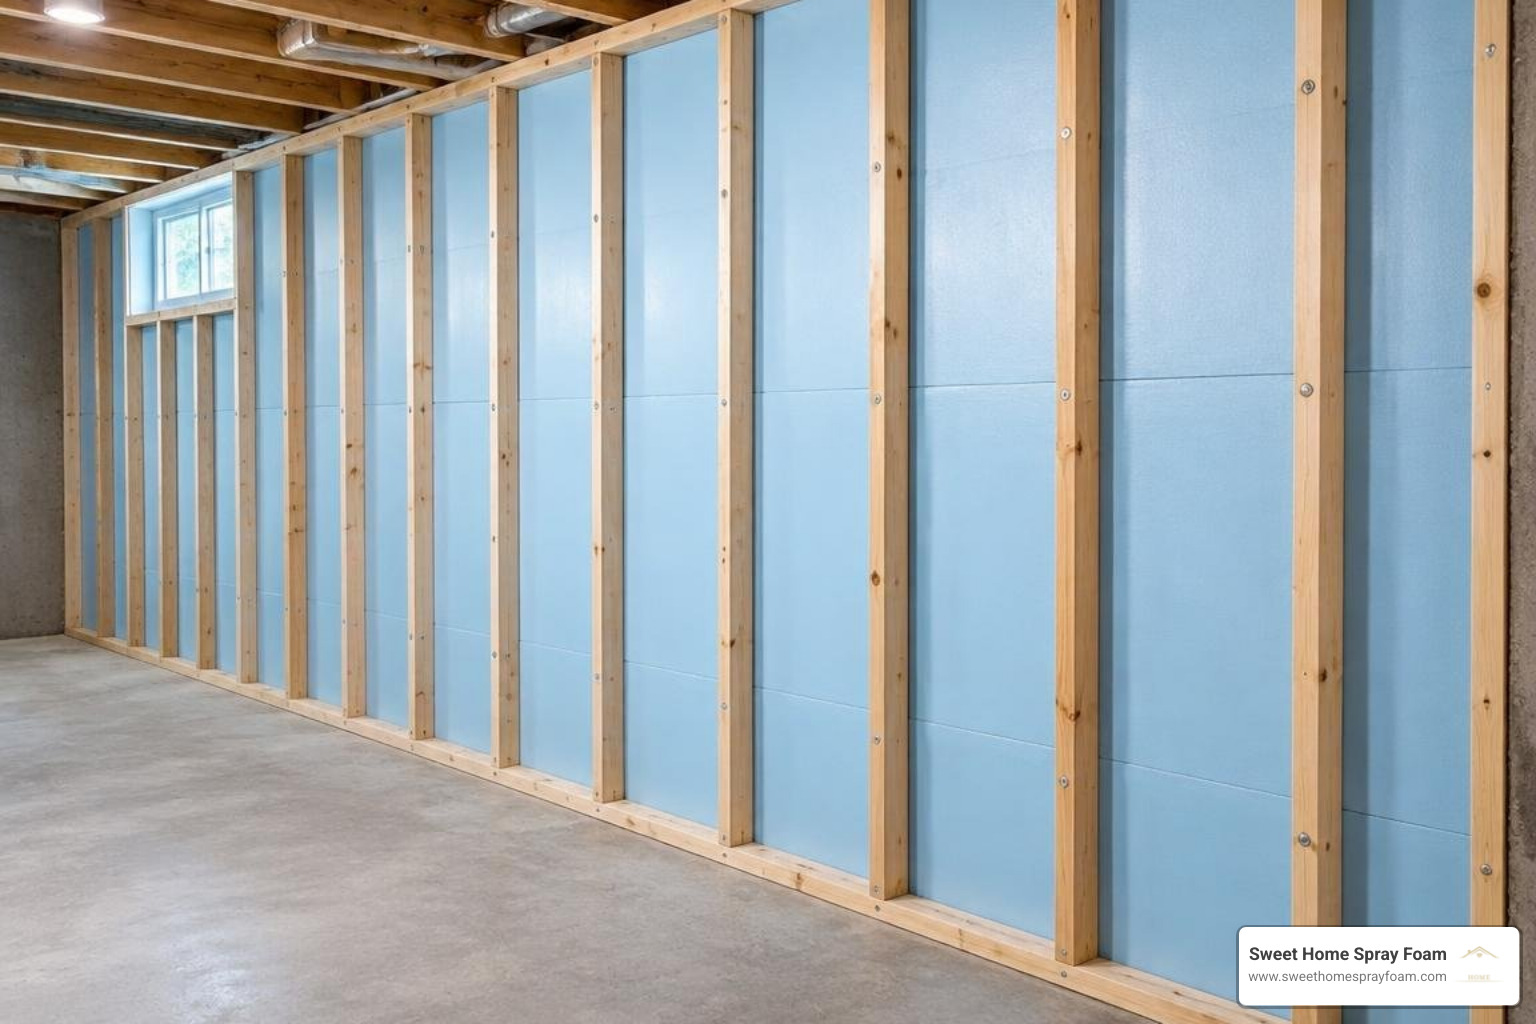
A functional finished basement needs continuous thermal protection, airtight construction, and rot-proof framing.
Proper Order: Sequencing Basement Framing and Insulation
The single most common mistake in basement renovation is framing the stud wall directly against bare concrete and stuffing insulation batts between the studs. This practice creates thermal bridges through every wood stud and traps cool, damp air in hidden pockets, leading to mold blooms.
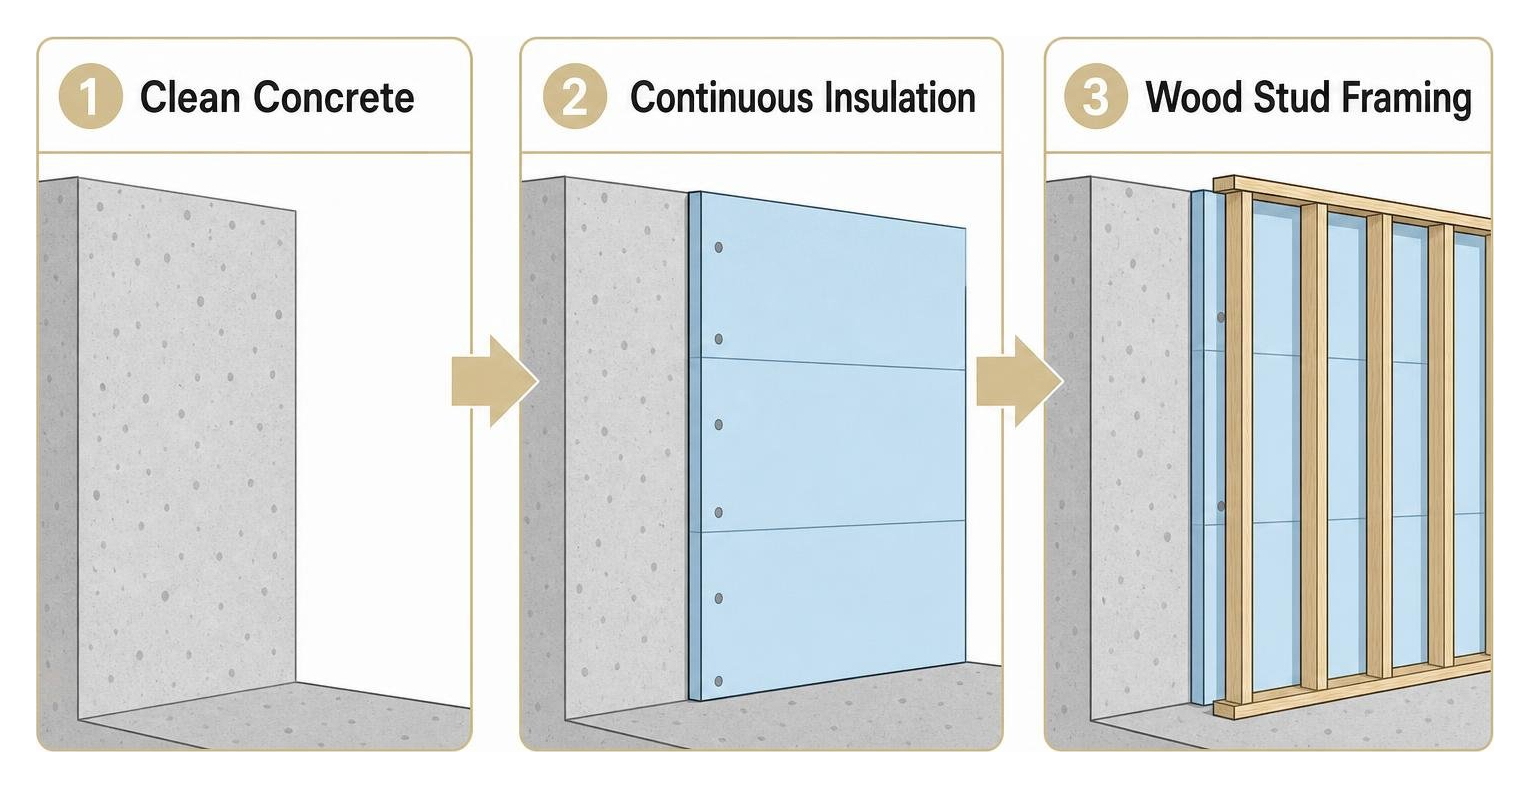
Always follow this sequence:
- Install Continuous Insulation First: Fasten continuous rigid foam board (such as extruded polystyrene / XPS or expanded polystyrene / EPS) or apply professional wall spray foam insulation directly across the bare concrete.
- Seal All Seams: Tape every board joint with insulation tape and seal perimeter edges with canned expanding foam to stop warm indoor air from reaching cold masonry.
- Build the Framing in Front: Assemble your 2x4 stud framing directly in front of the continuous insulation layer.
This sequence creates an uninterrupted thermal break, which is essential when choosing the best internal wall insulation approach for below-grade spaces.
Air-Sealing and Insulating the Critical Rim Joist Area
The rim joist (or band joist) sits atop the foundation sill plate and experiences significant air leakage and heat loss. Leaving this transition unsealed allows cold winter drafts and humid summer air to enter your floor structure.
To treat rim joists:
- Spray Foam Application: Closed-cell spray foam expands into every gap, providing an air barrier, vapor retarder, and high R-value in a single step. Learn more about sealing this transition in our overview of basement rim joist insulation.
- Cut-and-Cobble Rigid Foam: Cut 2-inch thick XPS rigid board slightly smaller than the rim joist cavity, push it firmly against the exterior band board, and seal the entire perimeter with high-expansion basement sealing foam.
Framing Layout, Pressure-Treated Plates, and Thermal Air Gaps
When setting up your framing:
- Use Pressure-Treated Bottom Plates: Concrete slabs wick moisture. Always use pressure-treated 2x4 lumber for any wood touching the concrete floor.
- Install a Foam Sill Seal: Place a closed-cell foam sill gasket underneath the bottom plate to isolate it from the slab.
- Provide a 1/2-Inch Buffer: Snap your baseline chalk mark so the wood studs sit 1/2 inch to 1 inch forward from the face of the rigid foam. This gap accounts for foundation irregularities and keeps framing lumber from touching cold, damp masonry.
- Anchor Securely: Fasten bottom plates using 1/4-inch concrete screw anchors (such as Tapcons) drilled every 3 to 4 feet.
- Frame on 16-Inch Centers: Standard 16-inch on-center stud spacing ensures solid backing for drywall and accommodates standard batt sizes, such as 23 inch wide insulation for 2x4 walls in joist bays or wider specialty configurations.
Material Selection and Code Compliance
Selecting appropriate materials ensures fire safety, thermal performance, and compliance with local building codes.
Meeting IECC Climate Zone Codes for Basement Framing and Insulation
Most of Virginia, including Richmond, Charlottesville, Lynchburg, and Roanoke, sits within IECC Climate Zone 4. In Climate Zone 4, basement walls require:
- Continuous insulation of R-10, or
- Cavity insulation of R-13, or
- A combination system such as R-5 continuous insulation plus R-13 cavity insulation.
To review official energy guidelines, reference the 2009-2021 IECC and IRC Minimum Insulation Requirements for New Homes as well as our basement insulation ultimate guide 2026.
Why Traditional Polyethylene Vapor Barriers Cause Mold Traps
Never install clear 6-mil polyethylene plastic sheeting over interior basement wall framing.
Basement walls must dry toward the interior during hot, humid summer months. If you place poly sheeting behind your drywall over framing, moisture becomes trapped inside the wood cavity between the cool foundation and the plastic. This trapped moisture feeds mold and rots the wood studs. Instead of impermeable plastic, use semi-permeable materials and follow our breathable wall insulation guide 2026.
Fire Blocking and Thermal Barrier Code Mandates
Because rigid foam and spray foam are derived from petroleum, building codes require them to be shielded from living areas:
- Thermal Barrier: Cover exposed foam insulation on finished walls with at least 1/2-inch gypsum drywall or an equivalent 15-minute fire-rated barrier.
- Fire Blocking: Concealed stud cavities require fire stops installed at 10-foot horizontal intervals, at ceiling transitions, and around mechanical chases. Approved fire-blocking materials include 2-inch dimensional lumber, 1/2-inch drywall, or tightly packed mineral wool batts, as detailed in municipal Typical Finished Basement Details documentation.
Navigating Complex Obstructions: Utilities, Radon, and Sump Pumps
A finished basement rarely features empty, flat walls. You must safely frame around plumbing, heating equipment, and safety systems.
Framing Around Plumbing, HVAC Ducts, and Electrical Panels
- Soffits and Bulkheads: Build drop soffits (ladder assemblies) using 2x2 or 2x4 lumber around low-hanging HVAC ducts and plumbing drain pipes. Maintain clear mechanical headroom without pinning drywall against sheet metal.
- Access Doors: Never bury cleanouts, water shutoff valves, or gas valves inside drywall. Install removable decorative access panels or use faux return-air grilles for access.
- Electrical Panel Clearance: The National Electrical Code requires a clear workspace in front of electrical breaker panels measuring at least 30 inches wide, 36 inches deep, and 78 inches high. Build framing around the panel rather than enclosing it inside an inaccessible wall.
Working Around Sump Pits and Radon Mitigation Systems
- Sump Pumps: Keep the sump basin clear of framing. Fit the pit with an airtight, bolted lid and silicone gaskets to prevent radon and moisture vapor from leaking into your living space.
- Radon Mitigation Pipes: Maintain an airtight seal around PVC sub-slab suction pipes where they penetrate the slab. Frame framing walls around the pipe with a 1/2-inch isolation gap so mechanical fan vibrations do not transfer into your living room studs.
Frequently Asked Questions About Basement Walls
Should rigid foam go behind or inside the stud cavities?
Rigid foam should always go behind the stud framing, continuous against the foundation wall. Installing it behind the studs creates an unbroken thermal break that stops the wood from conducting cold temperatures and eliminates hidden condensation surfaces.
Is fiberglass batt insulation safe to use in a basement?
Standard paper-faced fiberglass batts should never touch bare concrete. The paper backing and binder can serve as a food source for mold when damp. If you add cavity insulation inside the framing after installing continuous rigid foam, consider using hydrophobic mineral wool or closed-cell spray foam instead.
How much space should I leave between the frame and concrete wall?
Leave a buffer space of at least 1/2 inch to 1 inch between the back of your framing studs and the face of the foundation wall or rigid foam. This gap ensures your framing runs straight and plumb regardless of uneven concrete while preventing wood-to-masonry moisture wicking.
Conclusion
Finishing your basement adds usable living area and boosts home comfort, but your renovation will only last if moisture control comes first. By testing for dampness, sealing rim joists, running continuous insulation behind your studs, and avoiding impermeable plastic vapor barriers, you keep mold out of your walls for decades to come.
If you are planning a basement remodel in Central or Southwest Virginia and want an airtight, code-compliant foundation, we can help. Contact Sweet Home Spray Foam for upfront pricing and professional basement insulation services in Roanoke, VA.